Showing posts with label videos. Show all posts

Friday, February 8, 2019

Finally Friday Artist Channel Share: Meet Susan From Turtle Soup Beads

Yay, finally Friday! Months ago, I planned to have regular Tutorial YouTube Channel Recommendations. As usual, I have not been consistent in doing that. I keep learning so much from so many great people out there that I thought it would be valuable to recommend these great art making tutorials. I like creating videos as well, but it's only because of all I have learned and will continue to learn that I am able to expand my skills.

Today I want to share a new very fun favourite, Susan from TurtleSoup Beads! She is fun , very good at explaining and keeping it real. I love her bright colour palette and cheery, pretty designs. She mainly shares polymer clay tutorials, but also is clearly a beading artist. She shares wonderful tips and inspirational ideas not just for beads but how you can transform them into jewellery pieces.

It is tough to select a few good video tutorials because I love them so much. Needless to say, below is a large selection of some of my favourite tutorials. Bonus is, a tour of Susan's studio! We all love studio tours!

Enjoy! Be sure to subscribe to her channel if you enjoy it too!


To connect more, check out:


Friday, May 4, 2018

LEARN WITH ME VIDEO SHARE: DIY Silk Screen

Do you like t-shirts with printed images on them? Do you know how those images are placed on the shirt? One technique is called Silk Screening.
This is painting by me, Anita Berglund. I paint with Acrylic paint, 
the same paint used for silkscreening on polymer clay and other surfaces.
This technique can be used on polymer clay surfaces as well as others. But today I want to share some DIY video tutorials from others on how to create your own silk screen They can be expensive and besides as a visual artist, I love very opportunity to create my own images/designs.

To Create Your Own  SILKSCREEN You will Need:
πŸ’“A pair of panty hose, piece of silk or a piece of sheer curtain 
πŸ’“A jar of Mod Podge or a decoupage medium that is dishwasher safe so the screen can be washed.
πŸ’“An image that is drawn on paper
πŸ’“A Embroidery hoop or m\a frame then duct tape to secure the screen part tightly to
πŸ’“Marker or something to draw image with
πŸ’“A Silicone or Teflon craft mat (optional)
πŸ’“One tutorial calls for using Freezer paper
When it is time to use your silkscreen on Polymer Clay, you will need:
πŸ’“acrylic paint. Or as one polymer clay video shows below, you can use the dry method. For that way, use mica, pigment or chalk powders.
πŸ’“A Squeegee or old bank card as a scraper device
πŸ’“A tub of water to wash silkscreen immediately or the paint will dry and ruin your DIY  silkscreen
πŸ’“Your polymer clay sheet, ready to be silkscreened

To inspire ideas about what silkscreen printing can do for polymer clay, first,  I will share some related videos!
POLYMER CLAY AND SILKSCREEN


DIY SILK SCREEN: MAKING THE SCREEN FOR PRINTING


I am going to try making my own design and silk  screen. When I do, I will be sharing all about that. Just need to order a few materials first!

If you try this, share our pics and thoughts at our HeArtfully Creating Facebook Group here And/or my HeArtfully Creating Facebook page.

Thanks for stopping by!
HeArtfully Creating
Anita

Connect Some More With Us!

Be sure to share your creations with us at our Heartfully Creating's Facebook Group

"LIKE" HeArtfully Creating Here on FACEBOOK

A BERGIE CREATION - at Etsy, my handmade jewelry shop

ABC On Twitter

Wednesday, March 28, 2018

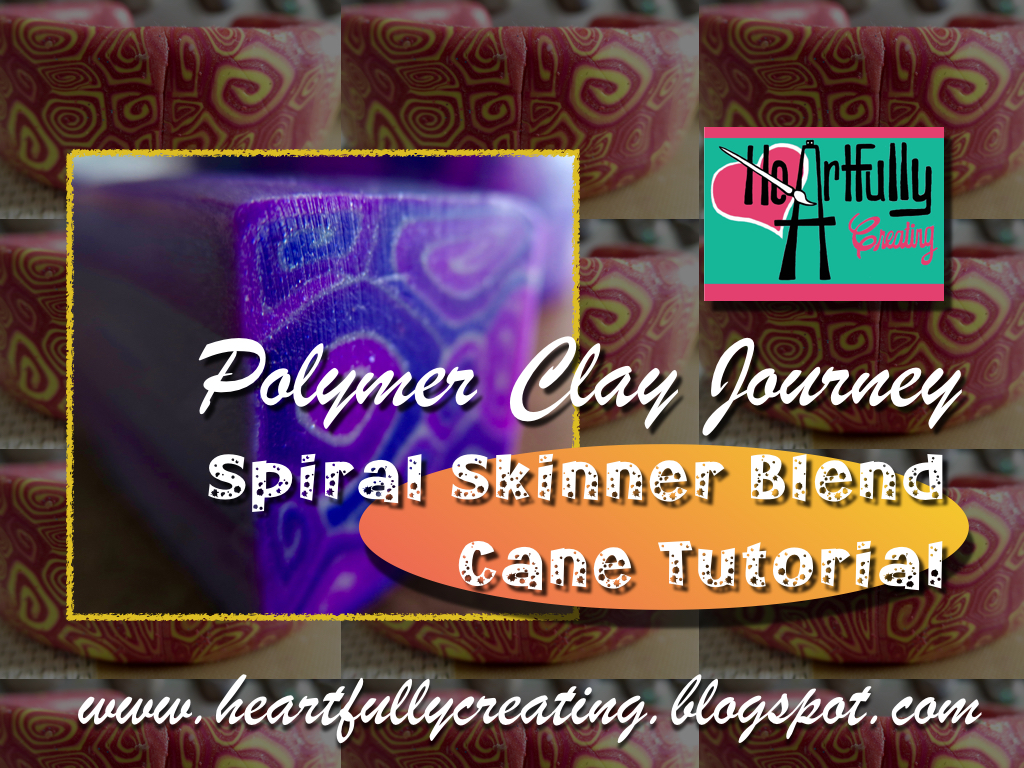
Polymer Clay Journey Learn With Me- Spiral Skinner Blend Cane

 Hi guys! Hope you are all enjoying some form of creativity. It has been a productive time for me thanks to discovering those great bracelet cuff templates (check that out here) and because of some special projects for those I love. Stay tune for more about my most recent one, a special birthday gift
I got to give to my Dad yesterday. He turned 75 today! I will call it a learning experience in resin and polymer clay. You will see sometime by the weekend!

My last tutorial was about using those great bracelet cuffs but I was using a Spiral Skinner Blend Can that I just made up using some old bulls Eye canes I had. However, I was so excited about sharing that, that I didn't share how to make the purple spiral skinner blend cane. So here is the "Learn with me tutorial," on that. Just watch below. I started working on an illustration to show you how to do the skinner blend itself, but as often happens, I draw too many details and didn't get it done in time. Thankfully if you search "skinner blend tutorial" on You Tube, you will find many great tutorials. Here is one by Cool Tools.
Watch My Learn With Me Tutorial Right Below:

What You Need To Make A Spiral Skinner Blend Cane?
πŸ’“A Polymer Clay Skinner Blend Cane (about 2 inches long and about 1 inch across.
Make sure you have a contrasting outer layer of clay on the outside of your cane. I used Premo Pearl for this cobalt blue and fuschia pink cane- that creates a gorgeous purple.
Make sure you have a contrasting outer layer of clay on the outside of your cane.

Storing Or Using Your Cane
As you can see in the tutorial video and in the pics, my cane is created with spirals but once it is reduced and ready, the spirals are in various shapes. I purposely want my spirals to become abstracted designs that would work well to us in a variety of projects.
You can slice it thin or thick, depends what you want. I used it and some others as a veneer or covering to make cuff bracelets. Now even if my slices are a bit skewed, I just roll them out to join seams. That distorts them some more. Which for my purpose is cool. That way there is more variety to my pattern.

To store canes and polymer clay in general, make sure it is in a polymer safe container. I have alo rolled or covered mine in wax paper and ziploc brand plastic baggies. If they are stored for a long time, they will crack when you slice them. It is best to re-squeeze or roll them to warm them up.

Some people have no problem using old canes. I have decided they are only okay if it is a project that won't require too much flexing. In my case, the canes still seem to crack to easy and I get disappointed. Which has caused me to conclude that instead of making so many canes and even pre rolled sheets ahead of time, I should make what I need as I need it. That is just my lesson learned so far. Yet, I did have a large flower cane and it worked out well a couple years later. I think the canes with translucent clay and alcohol inks are the most prone to future cracking. You try what you want and see what happens. Room temperature makes a difference too. Warm is great for me, makes clay easier to condition. Cold temps, too frustrating to work with.

Question Time
Have you noticed a difference working with polymer clay if your environment is warmer or colder?
a) YES            b) NO         c) SOMETIMES

HeArtfully Creating,
Anita

Hope you re inspired to try making a simple fun cane like this or even making a bulls eye cane. That is the starting point for so many other great canes.

Thanks for stopping by!

Subscribe! Like and Share!! (if you want of course :o)

Join Heartfully Creating's Facebook Group

"LIKE" HeArtfully Creating Here on FACEBOOK

A BERGIE CREATION - at Etsy, my handmade jewelry shop

ABC On Twitter


Saturday, March 3, 2018

Polymer Clay Journey: Pressed Texture Bead Video Tutorial

Watch How To Make Pressed Texture Beads Below
Hello everyone! Hope you have been creating in whatever way shape or form you prefer. Today, I want to share a video tutorial, a very simple one at that  - about how to make some very simple and beautiful polymer clay beads. Beautiful because they are textural (click here to see my previous articles on making texture plates and rollers) and enhanced with pigment powders. Since I adore chrome chameleon nail art powders and flakes, that what I used. As well as, the forever tried and true, mica powders. If you don't have these powders, you can use sparkly eye shadows. Just don't use them on your eyes after.

You Will Need
πŸ’•conditioned polymer clay
πŸ’•Texture sheets or stamps
πŸ’•bead pins for piercing holes and baking
πŸ’•Pins or needle tools, and/or toothpicks or bamboo skewers
πŸ’•Mica, nail art and/or pigment powders
πŸ’•baking pan
πŸ’•card stock folded into a fan fold to lay beads on to bake
πŸ’•a bead baking rack or hand made one (skewers or stiff wires running across a baking pan -see my original one here)
πŸ’•Aluminium pan or foil to cover beads in oven
πŸ’•Ceramic tile to lay on bottom of pan
πŸ’•water based stirred polyurethane or glaze suitable for polymer clay
πŸ’•An oven set to 275 f if using Premo

HeArtfully Creating,
Anita

Subscribe! Like and Share!! (if you want of course :o)


"LIKE" HeArtfully Creating Here on FACEBOOK

Bergie Creation Shop Blog


A BERGIE CREATION - at Etsy, my handmade jewelry shop

 LIKE ABC On Facebook

ABC On Twitter

YOU Tube Channel

Pinterest


Saturday, December 2, 2017

POLYMER CLAY JOURNEY: My Collection Of All My Texture Related Videos!


I was excited to see that one of my first tutorial videos has received 8000 views! Guess which topic? It was an early one I made inspired by Kater's Acres. Katie has a tutorial video about how to make your own polymer clay texture sheet. Thank you Katie.
For me 8000 views for one video is a huge deal for me. When I am use to seeing 10 -20  views! Clearly,  I am not the only one who loves texture making in polymer clay. I recently broke down and purchased online,  my first Christi Friesen Texture Stamps, making three artist stamps in total. Lisa Pavelka's Flourish set is the only one I had for over a year. 
Texture is an element of design that artists use to make their compositions interesting. Other elements  are line, shape, colour, and space. We incorporated all of those tools be it a painting, sculpture, photograph....all visual art.  Some of us prefer one element more than another. My favourites are colour and texture. What do you prefer to focus on the most? 

On that note, let's have some fun focusing on texture and polymer clay.  I wanted to have some fun and have compiled all my texture related videos below. 
I hope you are inspired to make your own stamps or rollers, or to buy ready made artist's stamps like Christi's or Lisa's.

So grab a refreshment or some clay, sit back and enjoy texture making.
Watch...
Wow, over 8000 people have Watched This Video! 
Create Your Own Texture Plates


Make Your Own Texture Rollers


A Signature Stamp Is A Very Custom Texture


My First And Only, so far, Sutton Slice tutorial Using Lisa Pavelka's Texture Stamp


Making Your Own Texture Stamps


Texture Rocker Tutorial


Using My Christi Stamps For The Mica Shift Technique


HeArtfully Creating,
Anita

Subscribe! Like and Share!! (if you want of course :o)

LIKE HeArtfully Creating Here on FACEBOOK

Bergie Creation Shop Blog

A BERGIE CREATION - my handmade jewelry shop

 LIKE ABC On Facebook

ABC On Twitter

YOU Tube Channel

Pinterest


Wednesday, October 11, 2017

STRIKES?? No YouTube Videos For Now....

Hi guys. After three upload attempts  to YouTube, I keep receiving "Community Guidelines" Strikes. Nothing like that has ever happened before so I am trying to be patient while I wait for the results of my appeal. In no way did anything in my faux stained glass tutorial violate YT's guidelines. Based on what I have learned, I re-watched the video and though maybe the computer algorithm thingy mis-heard a word on my video. Some words apparently cause red flags when YouTubers post videos with those words. I don't  understand how they can twist and flag videos like mine, a clearly "safe," one - disrupting all productivity, based on non-human judgments. Oh well, nothing I can do now but wait for them to deal with my appeals.
I will still be posting articles, but for now, they just won't come with the videos that I love making.
Watch My First Non-YouTube Video Post Below :o)

Wednesday, March 1, 2017

POLYMER CLAY SHARE: Stephanie Kilgast of PetitPlat

This polymer clay artist will make your jaw drop! Meet Stephanie Kilgast, she lives across the ocean from us in Canada! She is best known for her miniature food replica work. Here is an interview link of her on the Food Network! There may be a lot of miniature clay artists out here in web world, but Stephanie of PetitPlat, stands out to me. Not only does she branch to into other areas (as you cans in her videos below), I enjoy hearing what she has to say while she creates her videos. Her colours are vibrant, she strives for realism, and at times she exercises whimsical creativity! Check out her funky Elephant Hybrid! Enjoy her work and her artistic wisdom!


Stephanie's Links Here:


Friday, February 24, 2017

POLYMER CLAY SHARE: Cindy Lietz, The Polymer Clay Tutor - One Of My Favourite Tutors

Photo by Anita Berglund of HeArtfully Creating and A Bergie Creation, Polymer clay

Hi guys. Wanted to continue sharing my favourite polymer clay you tube channels to watch. Cindy Lietz, a fellow Canadian artist,
has been one of the first poly clay artists, I learned from the most more than two years ago. She offers polymer clay lessons for specific projects that are available for a fee. As well, she has plenty of free hints, tips & tricks, reviews, advice, and mini tutorials. This lady does her research, all for us, then we don't have to! Thank you Cindy for sharing all your work and research. It has been and still is a great learning experience! I have heed a lot of your advice and it has helped. Number one lesson that I regret not heeding in the beginning was about using a thermometer to test actual oven temp! I learned the hard way :o(
 Below are a few of the many, many videos on her Polymer Clay Tutor YT channel. And click here to go to her blog and where you can purchase online video tutorials!
HeArtfully Creating,
Anita
WHICH PLASTICS ARE SAFE FOR POLYMER CLAY STORAGE
 
CINDY'S NECKLACES
NATASHA BEADS


MAKING SWIRLY LENTIL BEADS


ZIPPER CANE


ZINNIA CANE


SUTTON SLIC
E


Wednesday, February 15, 2017

POLYMER CLAY SHARE: The Unruly House Wife (Val) is Back!, She Who Always Makes Me Smile

Hi guys! I recently shared with you, one polymer clay artist and vlogger who makes me smile. She lives in the UK and always reads her fans comments and  even responds. It means a lot to us who admire and follow folks that inspire and teach us :o) Click here to see the first Share of Val, TheUnrulyHousewife on Y/T.

Today, I just wanted to share her newest tutorial and some other faves.

Be inspired.


Now Watch Valerie.....

How To Use A Lino Cutter On Polymer Clay


Five Things I Wish I'd Known When I Started Polymer Claying

Polymer Clay Bracelets Tutorial
Things I Decorate With Polymer Clay, Or Use As Molds

Time For You To Share: If you have a polymer clay artist that inspires ans teaches you, please share their work and link on HeArtfully Creating's Facebook page (click here). As well, we would love to see your work, even if it isn't in polymer clay. H.C. is a place about encouraging creativity of all kinds! Come, LIKE, Share and Subscribe!!