A place to encourage the creativity of artistic minds of all ages. Offering Ideas, Inspiration and Instruction and sharing the work of others who inspire me!
Showing posts with label polymer clay journey. Show all posts
Showing posts with label polymer clay journey. Show all posts
Hi guys! This is a short video talking about trying the Born Pretty chameleon nail art powders and flakes. Adding them to black or very dark polymer clay works the best. Theses pigments are amazingly beautiful. It is hard to believe that one powder or flakes can shimmer with two or more colours. It all depends on how the light hits the surface. To get more interesting effects, stamp textures into the clay and you will see even more great two tone effects! See the pictures of a few samples I have tried,
Watch Theses Beautiful Pigments Do Their Thing Right Here
A while back I was creating little Tweetees. If you follow H/C then you know I seem to get addicted to making the beads which means, it takes a while before I get the pieces turned into wearable art to sell in my shop. (I need to try to cover the cost of my art making supplies some way!)
Tweetees, The name reflects the cuteness of these little bird dangle drops. Pretty sure Tweet and Tweety might be copyright hence the spelling deviation. My beads are created to design earrings, bracelets, necklaces and such. Today after much work on a variety of bead styles slowed down, I finally got to post my first Tweetee earrings in my Etsy shop A Bergie Creation.
Hi guys! Decided that I had to share a short video about my recent project for a couple dear young brides to be. I have created beaded and friendly plastic hair accessories over the years, but so far have not made polymer clay hair accessories.
Below is a short video that features photos of my recent designs as well as some information you may find helpful. One lesson learned was about the "no-name" Hot fix glass crystals I bought from China on Ebay.ca. The above piece was decorated with Martha Stewart's white glitter and Pearl Ex micro Pearl mica powder.
A video is in the works but for now I wanted to share some pictures of some polymer clay projects that I have been working on. Got a little hooked on leaf and birdie or Tweetie making, enhanced with glass crystals that are called hot fix and are suppose to adhere to the surface when baked in the oven. (Bought on Ebay for a low cost. A big lesson was learned that I will share in a future post.)
Tweeties
These little Tweeties are about 7-12mm long, They are all handmade with no holds or anything. That means they vary in not just sizes but the shape as well. Of course I try to make them all the same inform but so far it doesn't work out that way. These little guys are accented with teeny faceted glass eyes. They can be used for bracelets, earrings, necklaces or anywhere you want cute little birdie dangles. Some were created using a scrap clay base and covered with a polymer clay cane design. The others were created using marbled clay. It looks really interesting when you use translucent clay mixed with coloured clay and portions of clay with less translucent.
A sampling of my new wee Tweets
Here are the leaf dangles that are sharped by hand as well. The sizes range from 12mm-about 20mm. Be sure to add bake and bond to insure the faceted glass stones adhere, even if you bought the ones called Hot Fix from Ebay. It was my first time using these. They are AB finished and beautiful. But, I did find out the hard way that they didn't stick during baking. I have watched a lot
of tutorials that say if you use the Swarovski brand with adhesive - you don't need to use any adhesive because the glue melds with the polymer while baking. All I can say is, test out the crystals after cooled to make sure. See , a bunch popped off after :o( However, they were not any brand name. You can embed them a little, so the clay wraps around enough to create a bezel like hold. Now I am trying bake and bond.
Below is a picture of how the glass crystals came off like nothing!
The bling could be picked off easily!
Hope you are inspired to experiment and create in whatever medium you choose.
As I write this, I decided I will make a video to share how beautiful my new Blinged out pieces are turning out! They are intended to be for brides and such! So stay tuned :o)
Hi guys! Happy spring. Just wanted to share a suer simple, beginner-esque tutorial about creating a simple leaf tutorial out of Premo Polymer Clay. These are intended to be a generic type leaf and a specific kind of plant. I am not a fan of using cookie cutters or pre-made shapes, if I can. So this is about a simple, effective way to make individual leaves. Because they are handmade one by one, no two are identical. That makes your pieces unique and personal and all that more original.
Hi guys! Hope you are all enjoying some form of creativity. It has been a productive time for me thanks to discovering those great bracelet cuff templates (check that out here) and because of some special projects for those I love. Stay tune for more about my most recent one, a special birthday gift
I got to give to my Dad yesterday. He turned 75 today! I will call it a learning experience in resin and polymer clay. You will see sometime by the weekend!
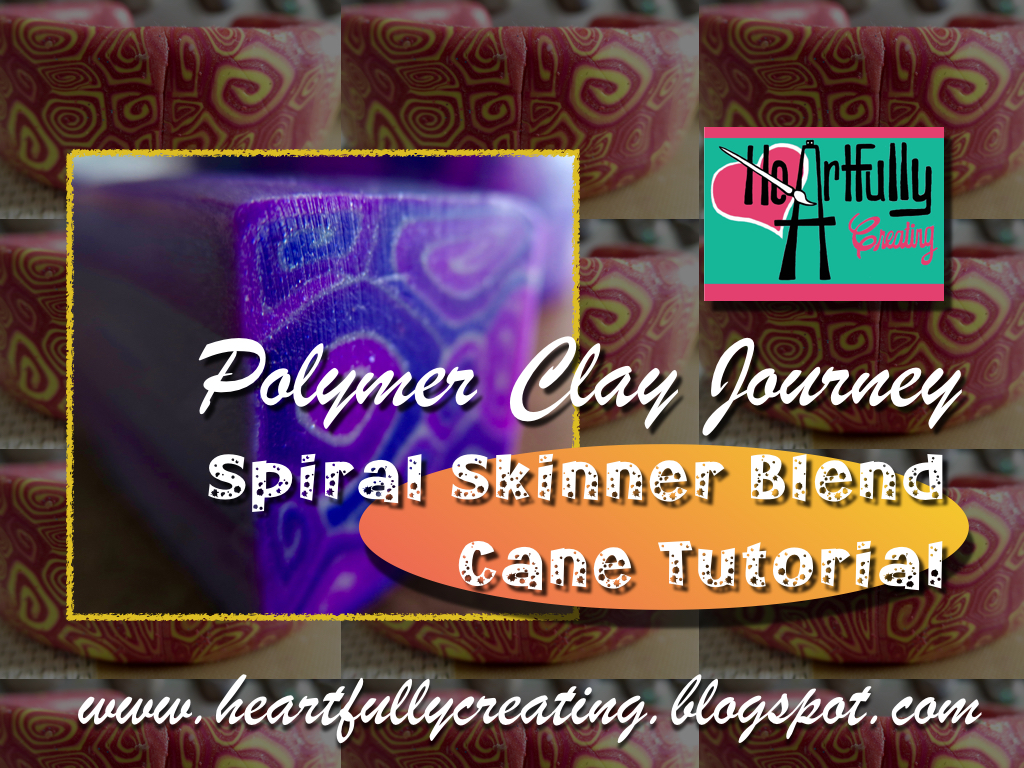
My last tutorial was about using those great bracelet cuffs but I was using a Spiral Skinner Blend Can that I just made up using some old bulls Eye canes I had. However, I was so excited about sharing that, that I didn't share how to make the purple spiral skinner blend cane. So here is the "Learn with me tutorial," on that. Just watch below. I started working on an illustration to show you how to do the skinner blend itself, but as often happens, I draw too many details and didn't get it done in time. Thankfully if you search "skinner blend tutorial" on You Tube, you will find many great tutorials. Here is one by Cool Tools. Watch My Learn With Me Tutorial Right Below:
What You Need To Make A Spiral Skinner Blend Cane?
💓A Polymer Clay Skinner Blend Cane (about 2 inches long and about 1 inch across.
Make sure you have a contrasting outer layer of clay on the outside of your cane. I used Premo Pearl for this cobalt blue and fuschia pink cane- that creates a gorgeous purple.
Make sure you have a contrasting outer layer of clay on the outside of your cane. Storing Or Using Your Cane
As you can see in the tutorial video and in the pics, my cane is created with spirals but once it is reduced and ready, the spirals are in various shapes. I purposely want my spirals to become abstracted designs that would work well to us in a variety of projects.
You can slice it thin or thick, depends what you want. I used it and some others as a veneer or covering to make cuff bracelets. Now even if my slices are a bit skewed, I just roll them out to join seams. That distorts them some more. Which for my purpose is cool. That way there is more variety to my pattern.
To store canes and polymer clay in general, make sure it is in a polymer safe container. I have alo rolled or covered mine in wax paper and ziploc brand plastic baggies. If they are stored for a long time, they will crack when you slice them. It is best to re-squeeze or roll them to warm them up.
Some people have no problem using old canes. I have decided they are only okay if it is a project that won't require too much flexing. In my case, the canes still seem to crack to easy and I get disappointed. Which has caused me to conclude that instead of making so many canes and even pre rolled sheets ahead of time, I should make what I need as I need it. That is just my lesson learned so far. Yet, I did have a large flower cane and it worked out well a couple years later. I think the canes with translucent clay and alcohol inks are the most prone to future cracking. You try what you want and see what happens. Room temperature makes a difference too. Warm is great for me, makes clay easier to condition. Cold temps, too frustrating to work with.
Question Time
Have you noticed a difference working with polymer clay if your environment is warmer or colder?
a) YES b) NO c) SOMETIMES
HeArtfully Creating,
Anita
Hope you re inspired to try making a simple fun cane like this or even making a bulls eye cane. That is the starting point for so many other great canes.
Thanks for stopping by!
Subscribe! Like and Share!! (if you want of course :o)
Hello everyone! Hope you have been creating in whatever way shape or form you prefer. Today, I want to share a video tutorial, a very simple one at that - about how to make some very simple and beautiful polymer clay beads. Beautiful because they are textural (click here to see my previous articles on making texture plates and rollers) and enhanced with pigment powders. Since I adore chrome chameleon nail art powders and flakes, that what I used. As well as, the forever tried and true, mica powders. If you don't have these powders, you can use sparkly eye shadows. Just don't use them on your eyes after.
You Will Need
💕conditioned polymer clay
💕Texture sheets or stamps
💕bead pins for piercing holes and baking
💕Pins or needle tools, and/or toothpicks or bamboo skewers
💕Mica, nail art and/or pigment powders
💕baking pan
💕card stock folded into a fan fold to lay beads on to bake
💕a bead baking rack or hand made one (skewers or stiff wires running across a baking pan -see my original one here)
💕Aluminium pan or foil to cover beads in oven
💕Ceramic tile to lay on bottom of pan
💕water based stirred polyurethane or glaze suitable for polymer clay
💕An oven set to 275 f if using Premo
Hello everyone! Hope you're having a very creative day. This has been something I have wanted to share for along time. I was so excited to discover These powders on Ebay.ca, that I ended up ordering a little here and there - meant it took a while for them all to arrive. In fact, when I get crazy about a newly discovered art making medium like that, I ended up with doubles and extras. Which is fine, because a lot of them were more sample sizes anyway. And trust me, This powders And flakes Are just so stunning, You kind of want all that you can get - In every color that is.
Once again, The nail art world, Impacts the polymer clay world. As many polymer clay artists will tell you, worlds definitely collide when it comes to polymer clay surface techniques. If you saw my actual fingernails, Oh wait you can when you watch my videos, You will see Just how awful my fingernails are. So clearly I don't buy nail art "Stuff" For My actual nails.
These powders are called mirror chrome powders, as well I've heard the term Chameleon used as well. The names may vary depending on who is selling them. As you will see in the video below, I have three of the same color, but each of them are a different "Powder." In fact one is an amazing Flake version, Another is a coarser grind called glitter powder (Reminds me of ultrafine glitter), And the other is the chrome powder (Reminds me of mica powder.) Now I do not think that These are mica powder based, If you know anything more about it please let me know. Because of the flake options, I think it might be synthetically made. Doesn't matter, There stunningly gorgeous.
Why So gorgeous?
Because depending on how the light hits the surface, You actually have two colors in one. I did the best that I can, to show that in the video below. It's tricky trying to capture the amazing Effects With my camera, But I think you get the idea.
Watch now See Just How Stunning Chrome Powders Are On Polymer Clay
Hi guys! Hope you are all HeArtfully Creating! I am looking forward to spring, how about you? If you have been here before, you may know how much I love making tube beads with polymer clay. In fact, I got so hooked on them, I compiled quite a collection that kept me busy creating the beads instead of turning them into actual pieces of jewellery. These days, I have obsessed with making window clingies. Does that happen to you? Do you discover new art making techniques or supplies and then that is all you can focus on until your next artistic discovery? That even happens to me with food choices as well. Eating a certain dish over and over until I can't look at it again! Keeps life interesting (Guess it depends on your perspective.) Well, I want to share a short video of a new necklace that I did make as a result of my tube bead obsession. To watch it is right here below this:
This video was created for my A Bergie Creation Shop blog, so sorry, no Howard :o( Just thought it would be nice to show you how beautiful your creations can be when you add them to handmade jewellery pieces! Then maybe you will be inspired to pick up some of your collected pieces and place
them in a handmade piece of wearable art or something like that. Unless you create your beads or pendants and use them as you make them. There are artists out there who don't want to accumulate pieces. Whereas some are like me, build up my collection so I then can get reating jewellery. Question for you today is? Are you a A) Use as you create them artist? OR B) A Make them and accumulate them artist? HeArtfully Creating, Anita Subscribe! Like and Share!! (if you want of course :o) "LIKE" HeArtfully Creating Here on FACEBOOK A Bergie Creation Shop Blog A BERGIE CREATION - at Etsy, my handmade jewelry shop LIKE ABC On Facebook ABC On Twitter YOU Tube Channel Pinterest
Most recent Complex cane, Abstract style- Anita Berglund
Yes it is Cane season! Okay, I am trying to be funny trying to come up with a word that works with the subject of this tutorial. Meaning, today I wanted talk about making canes with polymer clay. And yet I know Candy canes can be seen everywhere in December. When I was a kid, it seems that everywhere you went someone was giving away candy cane.
With all this talk about Candy canes, you'd think that I love them. Nope, I don't. But it's just the best way to help explain cane making, be it with sugar or clay, and even in glass making.
For starters, here's my new video that shows examples of the various types of polymer Clay cane techniques that I've done so far. As well as, a wee bit of a tutorial- hoping that you will be inspired to try Caning if you haven't already.
Cane making, be it with sugar, glass or clay, is that you can create multiple images of the same design. It is a two dimensional design in a three dimensional form. As well, you can make that same image in various sizes. They're called canes, because once they're all made up, they look like a staff or a cane used for walking.
Which reminds me, our dear brother-in-law, Curly, passed away last month and he used to make handmade walking sticks for people he cared about, out of diamond willow (a type of tree), and they arm pretty much long and straight, hence the name cane.... Watch here "Polymer Clay Journey: It's Cane Season "
I found videos like the one below, about traditional candy making, very beneficial and useful, to help understand how caning comes together. About the Candy making video below Lofty Pursuits, is an interesting YouTube channel that features a candy making shop. The candy maker creates candies using the cane method. I enjoy listening to his commentary as he creates traditional beautiful candy. You can skip closer to the end to see the actual can come together. But I strongly suggest enjoying the entire video, if you have the time.
Now how do I make a Cane?
Well as you may have guessed already, there are many types of canes and therefore, a plethora of Cain making tutorials from trusted artists and companies in existence already. which means it is kind of redundant for me to redo something that has already been done so well in so many ways.
That is why, I decided to share a list of names and companies that you can click on, to go directly to polymer clay cane related tutorials- all in video format on YouTube. That's just the way I like them.
Learning from as many Polymer Clay artist as you can find on YouTube and elsewhere, it Is highly beneficial. Learning the basic skills like a bull's-eye, jelly roll, checkerboard and striped cane, along with learning the Skinner blend technique (for creating a gradation of two or more colours of polymer clay) make a great foundation for cane making, with polymer clay not sugar of course.
Subscribe! Like and Share!! (if you want of course :o) Come and join my HeArtfully Creating Group on Facebook. Here is where you can show us your original artwork, questions and thoughts here. There is a guideline page.
I was watching a great broadcast that mentioned polymer clay figure making. That got me thinking about the few I have had fun making. Since I have created some, I thought I would make a compilation posting of my clay figures so far. I included the original post links and videos (for the ones I made videos for.) A Side Thought Or Two On Originality. Sculpting figures makes a great personalized gift of love. I prefer to do people I know and not characters. Years ago in College, we had it drilled into our heads about copyright so I always worry about breaching it. I would love to hear from anyone who knows how people copy trademarked or copyrighted images in clay, drawings, and other forms and avoid copyright infringement. The one key thing we were taught (in an Arts Administration program, was that the belief, if you aren't making money from it, it is okay to copy (in that class they specifically talked about music. Our Professor even said that technically, it was breaking copyright to even sing a song off the radio without permission/licensing fees. That class was twenty five years ago, maybe laws have slackened? As an art mentor, I always encourage budding young artists to be original. But, many grew up copying favourite characters from games, videos and such. Then I tell them it is okay to be inspired by other artists, but alter the image and make it your own. Be original guys. It is worth it! On with the show, this is it....(Is that line copyrighted?) Hmmmm....Hope you are inspired even a little. For My Dad's Birthday (Click here To see Video and Original Post)