Watch The New Promo Video For Our YouTube Channel!
Wednesday, May 31, 2017
Tuesday, May 30, 2017
Polymer Clay Journey Video- HELP! My Clay/Pasta Machine Knob Broke Off!!

If you are new to using polymer clay, You may not know that the one piece of machinery most of us use is either a pasta machine or a polymer clay conditioning machine. Essentially, the latter looks just like a pasta machine. My husband bought me one when I first started claying a couple of years ago, from the Michael's craft store. Normally I don't recommend going there because it is so expensive- Unless you have a coupon for 40% or 50% off of course. Needless to say, he did.
First of all, I do recommend the Amaco machine. Mine worked well.
The machine is by Amaco. Actually contrary to some of the reviews I've seen, it worked very well, for just over two years. It wasn't until recently that the knob that I'm going to talk about in the video below, fell right off. The knob I'm talking about is the one that tightens the clamp - Like a C clamp that holds the machine to the table while you crank it. It was plastic of course. Kind of ironic, since polymer clay Is polyvinyl Chloride which is a type of plastic as far as I understand it anyway.
Necessity Breeds Ideas...
Wrestling with what to do next, I got the idea to make a new knob for The clamp. After all Polymer clay once cured or baked, when thick enough, is quite strong.
Want to see what happened? Did It Work?
You will have to watch below:0)
Subscribe! Like and Share!! (if you want of course :o)
LIKE HeArtfully Creating Here on FACEBOOK: https://www.facebook.com/HeArtfullyCr...
HeArtfully Creating Blog:
http://heartfullycreating.blogspot.ca...
A Bergie Creation Shop Blog: http://abergiecreation.blogspot.ca
A BERGIE CREATION - my handmade jewelry shop
www.abergiecreation.etsy.com
Facebook:
https://www.facebook.com/abergiecreation
Twitter:
https://twitter.com/abergiecreation
YOU Tube Channel
https://www.youtube.com/user/anitaand...
Pinterest:
https://www.pinterest.com/abergiecrea...
HeArtfully Creating:
http://heartfullycreating.blogspot.ca
Sure Hope Gazette:
http://surehopegazette.blogspot.ca
Walking Way Overrated
http://walkingwayoverrated.blogspot.ca
TUMBLR
http://anitaberglund.tumblr.com
Sunday, May 28, 2017
Flower Talk: Creating Your Own Fabric Flowers

The flowers I made that you will see in the video, were created to be versatile. That was made possible by sewing a piece of fabric, making a loop on the back. Then you can add a brooch pin, Bobby pin, neck Choker, A Barrette blank...attaching it wherever you like. Except it doesn't work for hair elastics or head band elastics because they are closed loops. So as you will see in the video, for some of them I either sewed the elastic to the back of the flower directly or I made a loop using fabric and Velcro, making it even more versatile because you can open and close it around something.
Watch The Video Here:
These flowers can be made however you like. You can just cut circles or circles that have petal shapes around them, You can make the petals rounded or pointy. You will need to experiment with it when you melt the edges of the fabric because I tried smaller petal cuts and a lot of them just melted away into nothing. I found that a circle and rounded edges works best for the flowers.
Caution to Youth:
Because this involves a flame, please do not try doing this alone, if at all. We can make flowers without a candle flame. Much safer.
Flower Making Tips:
Size: Remember if you want a flower that is about 2 inches across, to cut your circles or shapes a little bit bigger because the edges will curl up when they melt as they curve up. Therefore making your flowers smaller than the original cut shape.
To make a fuller flower make more layers of circles In varying sizes. Then when you assemble the flower you have more rows of petals, making your flower fuller.
Materials Needed:
💗synthetic fabrics like satin (I used some old pj's), organza and tafetta.
💗Scissors
💗A marker if you want to trace out circles or flower petal shape circles
💗A sewing/beading needle that fit through the beads you use to make the center of the flower
💗Assorted beads or a focal button. Think of what you would like to be the center of your flower. As you will see some of mine having large focal beads and some have a cluster of smaller beads like freshwater pearls
💗Tea lights Or votives
💗 Templates to trace if you want- I just cut out my circles free form
💗fine clear filament or fishing line that fits through the eye of your needle.

This is for the basic around flower That reminds me of a poppy, One of my favorite flowers.
Plan what size of flower you want. Then cut three to five circles of different sizes getting bigger to smaller or smaller to Bigger.
Second Step:
Light your Tealight and proceed with caution. First experiment with the scrap of fabric, Preferably as shape similar to the one you're about to melt. Hold the edge close to the flame Going closer Very slowly, Until you see the ad start curl. If you have a flame, Your fabric has ignited Blow it out right away! You do not want to get so close that the fabric start on fire. It took me a lot of tries to get it right. If it helps you, Keep up little spray bottle of water or dish of cold water to put your finger In case it gets burnt.
And if you feel that it isn't safe enough perhaps this isn't the project for you. The last thing I want is someone to get hurt.
All I know is my hands to shake all the time and I was able to do it without any serious incidents.
Second Step:
Plan the center of your flower, arranging the beads or just use one large bead or even a button.
And have your fishing line threaded through your needle. All ready to go.
Third Step:
Once you have all Your circle Melted around the edges, It is time to assemble your flower.
Stack them according to the sizes that you cut them Big to smaller.
Fourth Step:
Select the bead or beads that you wanted to go in the center of the flower. Thread needle with the fishing line.
Fifth Step:
Push the needle up through the center or so out of the flower from the backside up And go back down and back up through a few times To secure the layers. Leave about a 2 inch tail, so that you don't pull the line, all the way through And have something to knot later.
Sixth Step:
Pick where you want your first been going to center. Push the threaded needle through it and go back down Through the fabric layers. Personally, I do this two or three times for beads that are bigger. If you're only doing One focal bead, Then end with your needle coming out the back. Cut the fishing line and tie that end together with the beginning "tail" to knot it securely.
Seventh Step is optional
Want it too be multi-functional? Sew on a strip/loop of fabric to the back after the center was sewn on. Use an open loop with velcro if you want. Or you can sew whatever finding you want to the back. Such as, a hair band, head band or a brooch pin.
Hope you enjoy making them if you're going to do it.
Thanks for stopping by.
💗HeArtfully Creating,
Anita
LIKE HeArtfully Creating Here on FACEBOOK: https://www.facebook.com/HeArtfullyCr...
HeArtfully Creating Blog:
http://heartfullycreating.blogspot.ca...
A Bergie Creation Shop Blog: http://abergiecreation.blogspot.ca
A BERGIE CREATION - my handmade jewelry shop
www.abergiecreation.etsy.com
Facebook:
https://www.facebook.com/abergiecreation
Twitter:
https://twitter.com/abergiecreation
YOU Tube Channel
https://www.youtube.com/user/anitaand...
Pinterest:
https://www.pinterest.com/abergiecrea...
HeArtfully Creating:
http://heartfullycreating.blogspot.ca
Sure Hope Gazette:
http://surehopegazette.blogspot.ca
Walking Way Overrated
http://walkingwayoverrated.blogspot.ca
TUMBLR
http://anitaberglund.tumblr.com
Monday, May 22, 2017
HeArtfully Creating: Jewellery Talk'n About Transforming Jewellery Findings With Alcohol Inks
Want to add colour to your metal jewellery findings? Well, take a look at my short video, to give you a suggestion on how you can easily perk up and transform your metal pieces! It is super easy!
Be inspired:
Watch Now!
 |
| Lots of Colourful Fun! |
Subscribe! Like and Share!! (if you want of course :o)
LIKE HeArtfully Creating Here on FACEBOOK: https://www.facebook.com/HeArtfullyCreating/
HeArtfully Creating Blog:
A Bergie Creation Shop Blog: http://abergiecreation.blogspot.ca
A BERGIE CREATION - my handmade jewelry shop
Facebook:
Twitter:
YOU Tube Channel
Pinterest:
HeArtfully Creating:
Thursday, May 11, 2017
HeArtfully Creating: Polymer Clay Journey - Pendant Inspiration

Hope you are even wee bit surprised!
Watch Below!


HeArtfully Creating,
Anita
Subscribe! Like and Share!! (if you want of course :o)
LIKE HeArtfully Creating Here on FACEBOOK: https://www.facebook.com/HeArtfullyCreating/
HeArtfully Creating Blog:
A Bergie Creation Shop Blog: http://abergiecreation.blogspot.ca
A BERGIE CREATION - my handmade jewelry shop
Facebook:
Twitter:
YOU Tube Channel
Pinterest:
HeArtfully Creating:
Tuesday, May 9, 2017
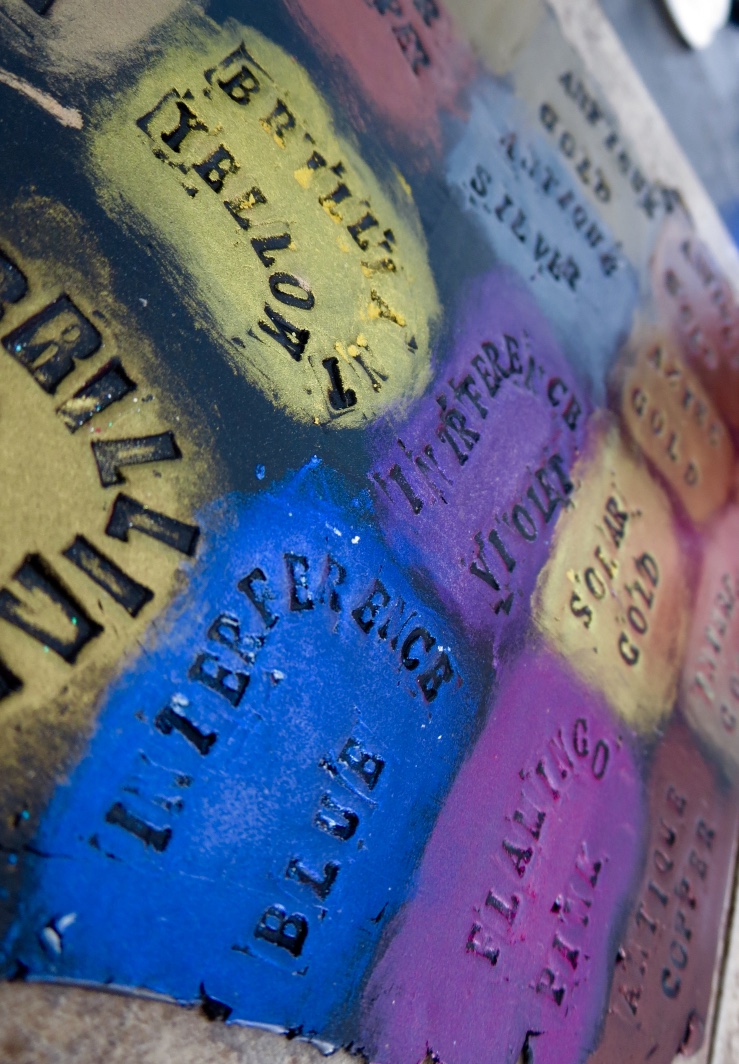
Polymer Clay Journey: Make Mica Powder Swatches

Since I began working in polymer clay, aside from chalk pastels, paints and polymer clay... I love them all and have gotten into the collecting of mica powders. They may be best known by a couple of brand names Pearl Ex and Perfect Pearls. Mica is actually a natural mineral that somehow has been processed in a manner that has been turned into a fine powdered pigment with great shimmer and special effects. It can be used on raw polymer clay or mixed into glazes, clays, liquid clay, gel mediums for acrylics and the like - even water and a spray bottle.
Not Just Eyeshadow!
Swatch Out!
Below is a video with more details about making swatches of your powders as well as some important notes about Primary Elements Pigment/Mica Powders by Luminary. Take a look.
Be inspired!
HeArtfully Creating,
Anita
Tuesday, May 2, 2017
Polymer Clay Journey: Making Large Holed Tube Beads - DIY Video

Hello guys! Hope you have been HeArtfully Creating whatever inspires you. Lately, I was inspired by Sandy Huntress of Keepsake Crafts (Click here to see the video), to make cool, large hole tube beads. I watched that video over and over. So this video is about how I made some of my tube beads.
As well, I was inspired by Patricia Roberts-Thompson's YouTube Tutorial about making your own bales from polymer clay. She used Sari ribbon. Sari ribbon is wonderful to use in layers, running through tube beads or just as a cord. Check out the video here that inspired me to purchase Sari Ribbon from the shop she mentioned.
Watch my newest Tutorial Below.
Hopefully you will be even a wee bit inspired to try them.
HeArtfully Creating,
Anita
Subscribe! Like and Share!! (if you want of course :o)
LIKE HeArtfully Creating Here on FACEBOOK: https://www.facebook.com/HeArtfullyCreating/
HeArtfully Creating Blog:
A Bergie Creation Shop Blog: http://abergiecreation.blogspot.ca
A BERGIE CREATION - my handmade jewelry shop
Facebook:
Twitter:
YOU Tube Channel
Pinterest:
HeArtfully Creating:


Subscribe to:
Posts (Atom)