A place to encourage the creativity of artistic minds of all ages. Offering Ideas, Inspiration and Instruction and sharing the work of others who inspire me!
If you love working in polymer clay like I do, you probably love creating textures in your clay. And you may already know about creating your own
texture Plates, Sheets, Or rollers. Have you ever heard of texture rockers though? If you have I would love to hear about it, so I won't wrongly take credit. I do think there may be styles of rubber ink text or number stamps for things like administrative purposes, such as a date stamp or a word like "CANCELLED" across your unpaid cable bill, ha ha.
As for the kind I am sharing with you, I like to think that I invented them as a solution for those of us with weakened or arthritic hands or those of us who can't stand up to apply even pressure. If you have learned from watching polymer clay tutorials, like I have, Then you will know that it is often recommended when impressing a texture that you should stand up and press down hard and evenly. Can't stand? Then you are with me maybe on how to find a solution to figure out how else to do it. That is why I am sharing this new video with you. It is about the TEXTURE ROCKERS or my new name may be "Rockit!" Hey, any big corporation like Makins or Polyform interested mass producing my idea, ha ha. No seriously, anyone? Of course, if I didn't invent this concept then, no million dollar invention for me 😁
The theory is that if you cannot stand up to push down on your texture stamp or plate, that way or you just don't want to, you can use the rounded texture surface and just push as much as you can and rock it back and forth on the clay, until it is how you want it to be. Therefore, making impressing textures and such possible or easier. That was my theory anyway. To find out if it worked Please watch the video below!!
Watch "Rockit" in Action Here:
Please share your thoughts, or ideas below and don't forget to subscribe if you want to stay up to date on posts and videos!
💕💕💕💕💕💕💕💕💕💕💕💕💕💕💕💕💕💕💕💕
Subscribe! Like and Share!! (if you want of course :o)
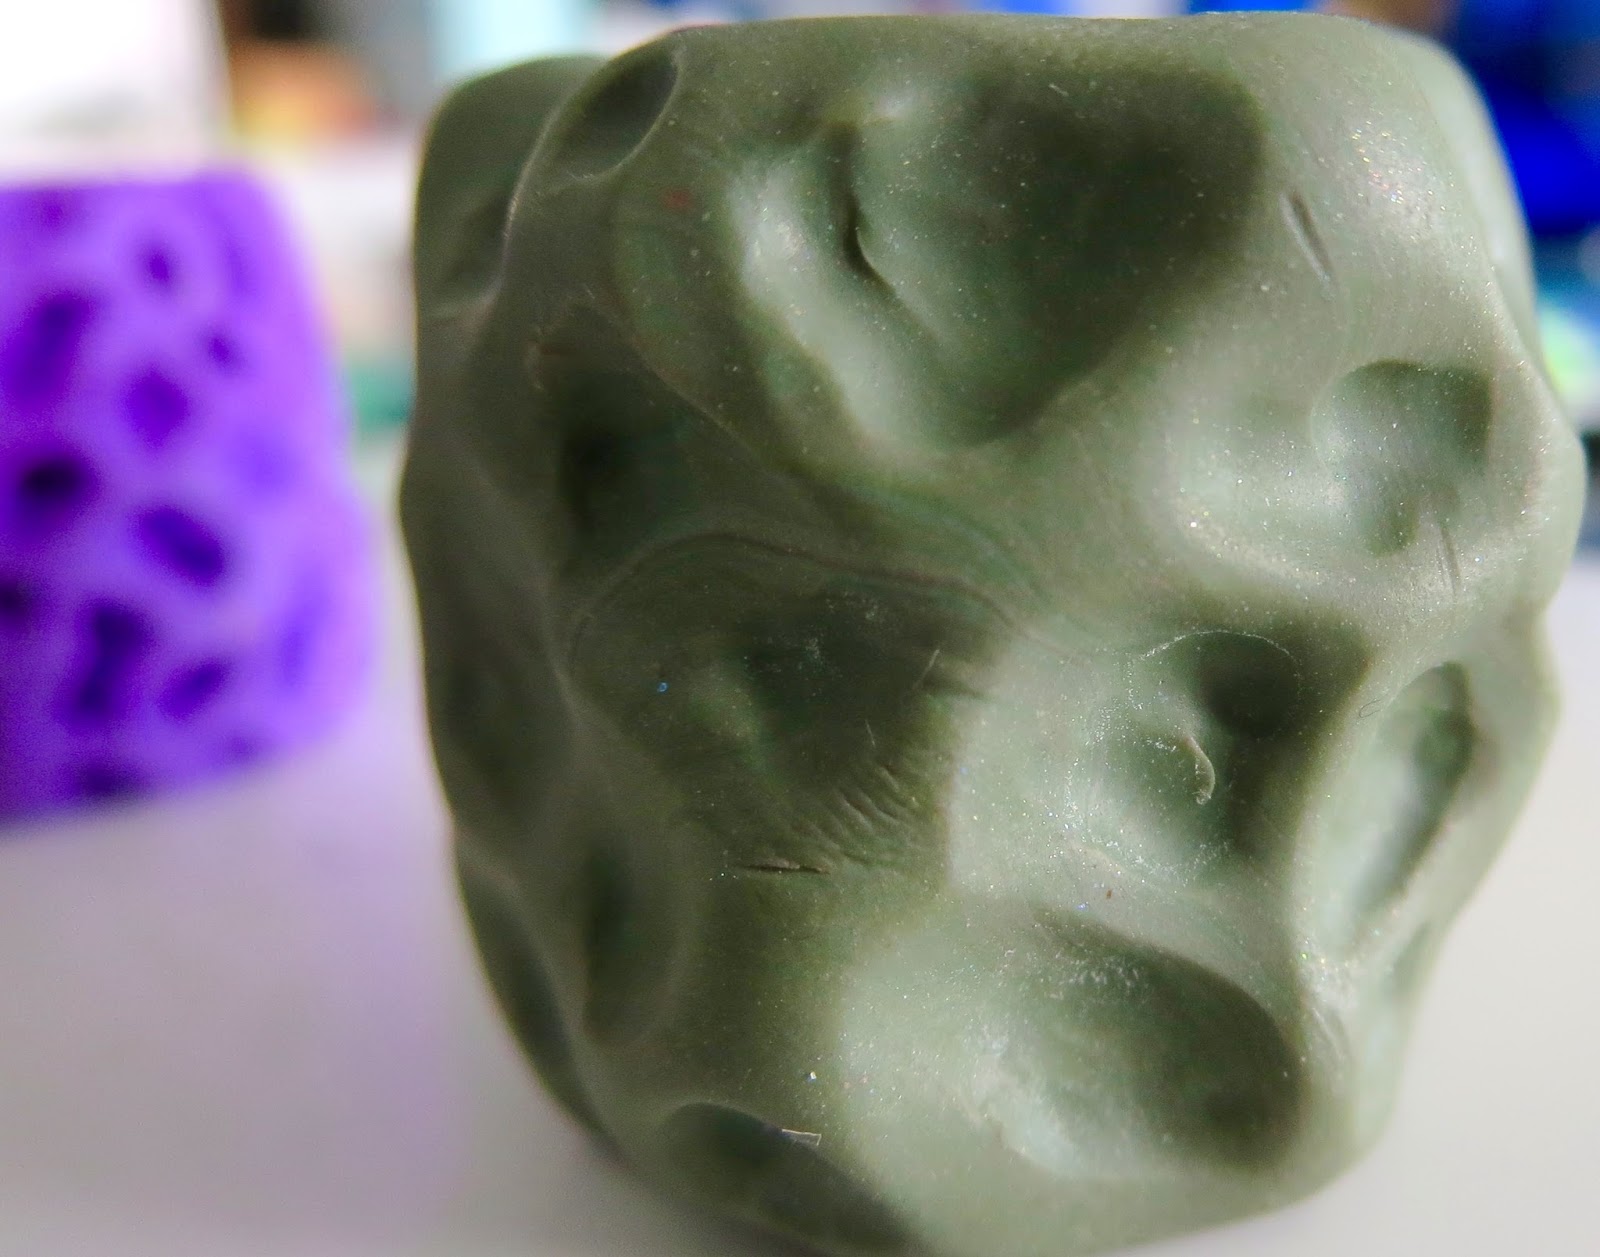
Sorry, I haven't completed that second texture Rocker and Roller video yet. But for now, I wanted to share this really cool texture rocker that I sculpted. By the time I was done, I thought it looked like a mess of Octopus tentacles. What do you think? A Lesson Learned
I explained in this video/post (click here) about creating texture "Rockers" to make it easier to use for those of us with weak hands. (So much for that theory.) As you can see, it definitely impressed textures but, my details were to deep and detailed. That meant, a couple of impressed areas tore up. As well, I couldn't rock it, I had to lay the sheet on the texture rocker and press it in.
How can we learn if we don't try things out!
Hope you feel a little inspired.
Thanks for stopping by.
HeArtfully Creating,
Anita
Subscribe! Like and Share!! (if you want of course :o) LIKE HeArtfully Creating Here on FACEBOOK: https://www.facebook.com/HeArtfullyCr... HeArtfully Creating Blog: http://heartfullycreating.blogspot.ca... A Bergie Creation Shop Blog: http://abergiecreation.blogspot.ca A BERGIE CREATION - my handmade jewelry shop www.abergiecreation.etsy.com Facebook: https://www.facebook.com/abergiecreation Twitter: https://twitter.com/abergiecreation YOU Tube Channel https://www.youtube.com/user/anitaand... Pinterest: https://www.pinterest.com/abergiecrea... HeArtfully Creating: http://heartfullycreating.blogspot.ca Sure Hope Gazette: http://surehopegazette.blogspot.ca Walking Way Overrated http://walkingwayoverrated.blogspot.ca TUMBLR http://anitaberglund.tumblr.com
If you are new or have returned for more fun, here at HeArtfully Creating, Welcome! I know it has been a while, But I finally have had a chance to put together a new video To hopefully inspire you to make your own polymer clay texture Making tools. That means they can be in a roller, sheet, or plate form. Because I am I was experimenting learning, You will see that I have tried Some variations. Since I love making my own texture tools, I have decided to make a three or four part series on the subject. Otherwise the video that goes with this article, would be way too long. Personally I find it easier to watch shorter videos in a series as opposed to a really long single video. I would love to hear what you think. It's much easier to focus on one or two pieces than my entire collection all at once.
Before we begin here is the video that goes with this article.
Tools You Need 💕1. Scrap polymer clay. Note: Now is a good time to use cheaper clays like Sculpey 3, or clays you do not like as much, That you happen to have lying
around. Also a good times to use up Colour Blends That you really don't like.
💕2. Sculpting tools. As well as Purchased tools. Use whatever you think will work best to make the shapes and textures that you want. If you're new to polymer clay and do not have An addiction to buying Clay tools, Like I do, Add want to save money, you can actually accomplish pretty much the same end result by using use items you would find around the house. For example: toothpicks, Knitting needles, Crochet hooks, dental tools (I was able to acquire some from a hygienist who is going to throw her tools away), Popsicle sticks, Skewers, Icing Tips for cake decorating, Screwdriver tips, Utensils....Just make sure whenever you use Stays dedicated for clay only.... NOTE: Because some plastics React to Polymer clay, Be careful not to leave whatever household item, you may be using In contact with the clay for extended periods of time. Metal And glass As well as wood, Are all safe. 💕3. An acrylic roller. Again if you're new polymer clay, You can use anything that we'll roll out your clay. You can use Metal cannoli forms, I wouldn't dowel, A smooth pen Or pencil. And for those who have the supplies, You can use the roller or the pasta machine. Again a reminder that anything used with Polymer clay, can't be used for food items after.
Polymer clay is not toxic, But, It is not recommended that you interchange tools That you would use for food preparation Or eating. 💕4. A dedicated baking pan For baking your texture sheets/rollers.
💕5. A ceramic tile Or a piece of glass that can be put in the oven To work and bake on. 💕6. Card stock Or file folder. 💕7. Tinfoil Or an aluminum baking pan that fits As a lid On the pan you will be baking your clay in. 💕8. Baby Wipes 💕9. Water spritzer 10. For A roller or rocker style, use a toilet paper tube, or a metal tube shape covered with wax paper. Most important, Your creativity!
Beginning
I like to work in a freestyle manner. If you have a specific design or texture or image you would like, then be sure to jot down your ideas in your sketchbook.
Foundation:
In this video you see that I am making a roller style texture tool. I wrapped wax paper onto a metal tube used for nail art. Using tape holds it well. Then I roll out polymer clay and in this case I added and shaped pieces as I wanted. Remember any texture left on the piece will appear on the raw clay you want to texture. So be sure to smooth out all that you want to be smooth.
Ready To Bake
Always bake on a dedicated baking pan, using a ceramic tile on top, with an insulating layer of card stock or a file folder. This helps distribute heat and avoid scorching.
Once your roller or rocker is ready. It is important to not bake your piece on a flat surface or you will have flat spots. I use bunches of tissue including toilet paper. Make a nice bed of soft kleenex or t/p. You can use quilting batting as well. At 275 degrees fahrenheit, these products will not burn. Make sure they do not touch the element. Lay your pieces down.
Tent It.
To help contain fumes and to avoid scorching, always use an oven thermometer to insure your oven is to temperature. As well tent some tinfoil over top or lay an aluminium cake pan on top.
I always bake my pieces at east one hour, even if thin. It makes it stronger.
When baked, let cool. And you are ready!
Using Your Texture Sheets and Tools:
For those of us with weakened hands like I do, we can still work with clay but we need to modify techniques at times. For instance, many tutorials talk about how you need to stand up and look straight down when slicing a cane or pressing on a texture stamp. In my case, I use a wheelchair and standing isn't an option. So, it just means that I need to be extra careful to slice straight down from a seated position. And regarding textures or rubber stamps, I have been learning that because we can't stand up, for leverage and to apply pressure, making a roller style texture stamp works better. I did try a rocker style stamp as you will see in the videos, but I still wasn't strong enough to apply pressure by rocking it back and forth. On that note, I find pressing the clay down onto the stamp or flat plate works best. Using your finger tips, pushing it carefully into the nooks and crannies. Just be careful it doesn't stick by using water or corn starch or even better...Baby Oil....
BABY OIL TIP: Baby oil has more than one use. I use it in small quantities to condition rock hard clay. In fact because my hands are weak, if clay is too stiff, I work in a bit of baby oil to soften it up. Maybe I will make a tutorial about that in the future. Regarding texture tools made from polymer clay, to avoid clay sticking to my polymer clay texture tools is, rub a light coating of baby oil onto the stamp or roller's surface. No only does it smell great, it kind of keeps the clay made sheets and such in a non-stick state. It reminds me of how you condition or season a cast iron pan or wok.
Next time, I will share another video in this DIY Texture Series!
Thanks for stopping by.
HeArtfully Creating,
Anita
Subscribe! Like and Share!! (if you want of course :o) LIKE HeArtfully Creating Here on FACEBOOK: https://www.facebook.com/HeArtfullyCr... HeArtfully Creating Blog: http://heartfullycreating.blogspot.ca... A Bergie Creation Shop Blog: http://abergiecreation.blogspot.ca A BERGIE CREATION - my handmade jewelry shop www.abergiecreation.etsy.com Facebook: https://www.facebook.com/abergiecreation Twitter: https://twitter.com/abergiecreation YOU Tube Channel https://www.youtube.com/user/anitaand... Pinterest: https://www.pinterest.com/abergiecrea... HeArtfully Creating: http://heartfullycreating.blogspot.ca Sure Hope Gazette: http://surehopegazette.blogspot.ca Walking Way Overrated http://walkingwayoverrated.blogspot.ca TUMBLR http://anitaberglund.tumblr.com
Here are some great textured tube beads that I really enjoyed making. But then I love making tube beads. Oh and it helps when you love the colour palette you are working with. Hopefully you will be inspired to try experimenting with colour and textures when you make polymer clay beads. Colour Mixing 101
Being able to mix colours in polymer clay like you can with paint is a wonderful thing. It is why I love working with polymer clay, painting in three dimensions! These beads were made by creating a colour been using a technique called the "Skinner Blend." It was created by someone named Judith Skinner. You can make it with a roller or a pasta/clay machine. Click here to see a tutorial on how to create a skinner blend, by a great new channel I like called "Jessama Tutorials."
Some folks like to mix colours of clay that are premixed by the company that makes the clay. It is a good way to start. But if you love colour mixing like I do, you often like to mix your own colours first and then put them into a skinner blend mix. These beads were created a little while ago so I can't remember for sure what I did. I think I used ready Mix colours, Premo (pretty much the only clay I use) Turquoise, Wasabi and Purple. Then they blend into some really great variations.
It is helpful to know the basics of colour mixing to achieve a palette you would like. Click here for some Colour Wheel Images.
In Paint it is easy to mix combinations of paint do see what colours create when combined. With Polymer Clay you can practice using little amounts if you want to by smooshing little portions of clay.
It helps to know the basics of colour mixing.
Primary Colours are: RED, YELLOW and BLUE. They are called Primary because we can't create them, hence the name "primary."
*Colour Note: of all colour results will vary depending on the primaries you use to begin with. For example mixing Cobalt Blue and Alizarin Crimson make a different purple than Cadmium Red mixed with Cobalt Blue.
Secondary Colours meaning we need to take two Primaries to make a Secondary colour: BLUE + RED = VIOLET/PURPLE
RED + YELLOW= ORANGE
BLUE + YELLOW= GREEN
Tertiary Colours are when we combine three colours to achieve yet another colour!
Analogous colour palette is what I ended up using for these beads. Analogous means using colours that are beside each other on the colour wheel.
Complimentary Colours are when you use colours that are opposite each other on the Colour Wheel. Because they are opposite, it is a great way to make a colour "pop!" Experiment, have fun and create what you love!
Here are some of these fun textured, large hole beads and one very large focal bead! Take a look....
Using a Skinner blend (see the sheet in the back.) Making a large focal bead began with one idea, making thin strips and laying them down in various patterns. That was all I was going to do. But then....
Then I started using my dotting tool to add textures and designs in the surface. As well, I started adding small balls of clay. When you create, try different things like adding shapes, textures, contrasting colours...whatever you think looks good to you. Adding interest makes your art work something you and others want to look at.
Since I love designing beads, I also made an array of smaller tube beads. Save all your bits of clay so you can make elements like dots and strips and whatever you can think of.
To bake, I just made a paper accordion or fan out of card stock, then the beads can just lay there, safe and secure. As well, I have baked using kleenex or tissue all puffed up. It won't burn at 275 Fahrenheit. Just make sure it doesn't touch the element.
To highlight areas and add shimmer, I did dust on some mica powders. Use your own preference. I just like shimmery mica powders.
Here they are. All cooled and ready to be turned into wearable art!
Making texture sheets, using your own designs, is a lot of fun and a great creative expression that can be re-used as many times as you
want. Unless your sheet breaks of course. After seeing texture rollers in a Polymer Clay Tutor product demo and the sculpted tool you can buy, I thought why not? So I tried making some texture rollers out of polymer clay and here are the results. Just watch the corresponding video below on our YouTube channel.
Materials Needed and Baking Clay Advice ∆If you have hands, that is your number one needed tool. ∆ You don't need fancy tools, just a craft or X-Acto knife ∆ Polymer Clay ∆ You can use anything to help make your impressions into the
I like to cover my tools and tin can holders in clay!
clay, popsicle sticks, toothpicks, utensils, needle tools, ball tools, cake decorating tools. Just do not re-use anything you use for polymer clay on food after. Keep them as special tools. ∆ If you want to purchase inexpensive polymer clay tools, I bought a lot for free shipping on Ebay from Asia. Just search for wax carving tools, clay tools, cake decorating tools, wire tools and nail art tools. From those searches, you will find a lot of cheap, helpful useful instruments.
∆ A Dedicated pan to bake on, I use a ceramic tile on cake pans I no longer use and then cover the items with an aluminium pan to protect the clay from discolouring. ∆ A Smooth craft sheeted surface. I use a large ceramic tile or piece of glass to work on. ∆ Bake your clay as per the package directions and then some. I
Add caption
follow all the advice I have heard which is bake always, at least for one hour to make it stronger. You can't burn your clay at the temperature on the package. Only if your oven isn't working right. Then it helps a lot to use an oven thermometer to make sure you oven is heating to the correct temperature. A Closer Look As well, here are some photos. No, I didn't film any of the actual making parts, but I think it is pretty self explanatory. I suggest looking up the video mentioned in the texture sheet article by Katie Oskin. Just think instead of a flat sheet of clay, you need to lay or imprint your designs or textures on a polymer clay cylinder. It is a great way to use up scrap clay. All clay is useable and has no reason to be wasted!
Love To Hear From You If you have any thoughts, questions, ideas or suggestions, please write them below. I would love to hear from you or if there is something you would like to see or learn about. If I can help, I will do my best. HeArtfully Creating, Anita
Subscribe! Like and Share!! (if you want of course :o)