A place to encourage the creativity of artistic minds of all ages. Offering Ideas, Inspiration and Instruction and sharing the work of others who inspire me!
Hi fellow creators! I know I already posted a mini version article here, about these great leaf charms/dangles. However, since I can now post YouTube videos, I did. It is far better than piecing together the one I had to do last week. So this video supplements/enhancing the first Leaves Are In The Air Tutorial. Watch My New And improved video here Below!
Thanks for stopping by.
HeArtfully Creating,
Anita
Keeping with the autumn theme, I had a great idea.... I cut out and hand textured some small leaves with my craft knife. Thought the clay mix of translucent with alcohol ink, would look really cool if I made varying shapes and baked them on a jar. As well, coating the surface partially with a golden mica powder.
Dimension!
To make sure they would be interesting, I carefully lifted and shaped each leaf, giving it a more realistic texture.
Then I had the "brilliant idea of pushing on some clear embossing powder. Well, doing it after texturing and positioning them on the jar, was probably the mistake that made my leaves like corn flakes. They are too bumpy and icky looking!
Take a look and see how dastardly they turned out. But that is how we learn. If we don't experiment, we won't know what works and what doesn't.
Thanks for stopping by.
HeArtfully Creating,
Anita Bacon, Corn Flakes or Leaves? You Decide.
UPDATE: Yay! Click here to see the new video on YouTube that supplements tis tutorial.
___________________
I have been having some fun with the new nail art powders and ended up creating some really beautifulautumn leaves for bracelet or necklaces, or what ever you wish.
How did I create these?
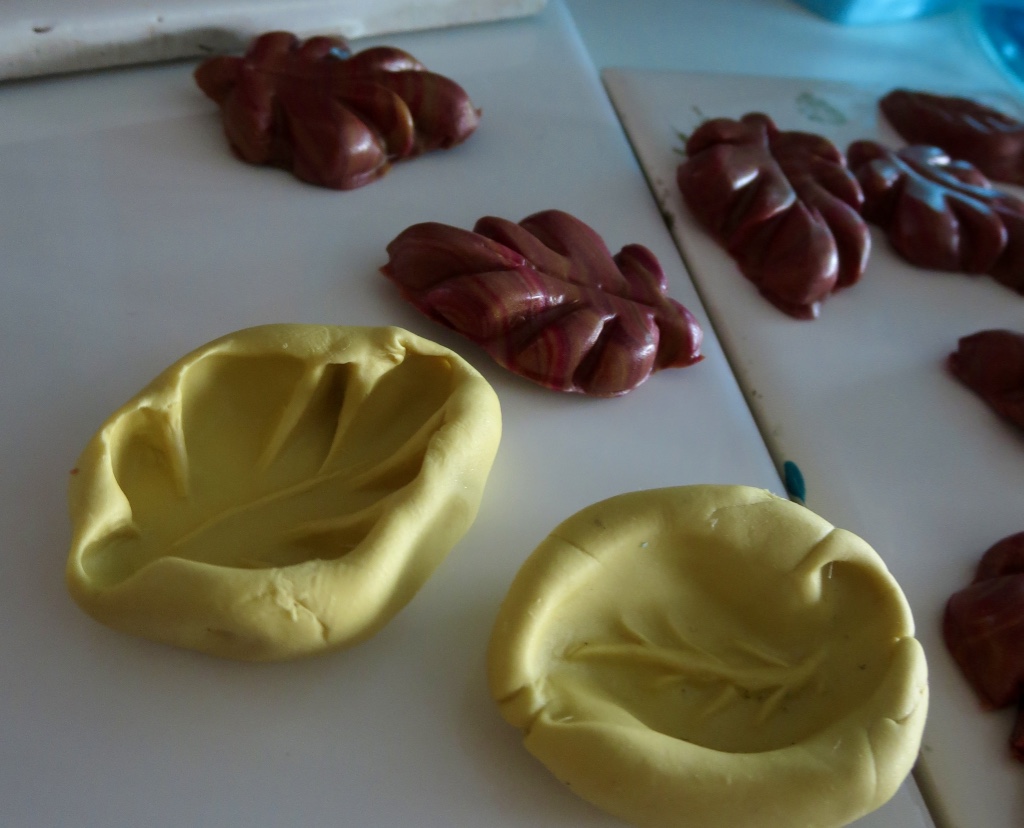
The molds I made of my own leaf designs
I like to create my own images and texture sheets as you know.so for this project I wanted to make multiple images of the same thing. In light of the fact that it is autumn, it makes sense that I dug up some original molds.
A couple of years ago I made a couple of these original leaf shapes. Since I was experimenting making my own molding compound, using silicone caulking (very stuff we use to seal up our bathroom sinks and such) some corn starch and a bit of acrylic paint for colour, I made molds of these two leaves. You can find DIY’s for this silicone mold making technique online. It works, but takes practice- getting the correct consistency. Needless to say, for me personally, I ended up buying a box of ready-made mold maker. In the photos you'll see the yellow molds, those are the store bought mold maker. And the turquoise blue one, is my home made compound. I did try using it last week, but it wasn't as smooth as a store-bought mold maker.
I carefully removed each one from their mold, making sure everything is smooth with no cracks or dents.
The clay that I used for these pieces, was Premo brand translucent. I added colour by using alcohol inks and marbleized it. The clay needs to be soft and conditioned in order to push it into the molds.
The leaves just pulled from the molds. Not cleaned up yet.
Laying them all out, I cleaned each piece up- using a craft blade, making sure nothing was messy or scraggly.
Bake me!
I used a green mica powder to highlight the veins, then later, I switched to a blue powder.
Then I highlighted each piece with a few coloured nail powders (really they are mica powders)
I wanted to make the backs neat so I pressed them on to a texture stamp
Laying them all out, I cleaned each piece up- making sure nothing was messy or scraggly. Then I highlighted each piece (front and back) with a few coloured mica powders. You can leave the clay colour alone if you want to, or use powdered chalk pastels. As well, you can use surface enhancing techniques after fired, using gilders paste, Inka Gold paste, acrylic paint...up to you.
Bake them on a card stock sheet or a non-shiny ceramic tile (shiny results in a too shiny back). I bake everything for at least one hour (covered with tin foil).
Love experimenting with my new chrome pigment nail art powders (Mica with two tones-depending on the lighting)
I cut little pieces oftwenty gauge wire, forming them into a loop shape. Then using pliers, I carefully inserted the the irregular end into the part of the leaf, that I wanted it to hang from. you can use jump ringsif you don't want to make your own wire loops. They loops will not fall out if you havea bended part tucked into the clay.
Try placing the hanging loops in a variety of places to create interest.
After, I coated them after with satin Polyurethane. They almost have a faux Raku finish.
You can see the blue veins
Here are some more photos. Hope you are inspired a little.
I'm talking about. Not going to let that get me down, so here are some more of my recent faux stained glass window clingies.
To learn how to make them, click here to see my last tutorial on faux stained-glass. And yes as soon as YouTube realizes their censoring software or algorithm thingy misinterpreted a word or phrase as something inappropriate, the sooner I can can get back to making better videos. I will re-post the video that goes with the "how-to tutorial).
If you follow this blog at all, you know I create videos not just to share the "how-to" part, but because I can't stop taking pictures, so videos provide a way to share the pics. Otherwise, my posts, like this one- become loaded with far too many photos and can be hard to follow.
Simple videos
For now, I am testing out the feature on blogspot to upload simple (no frills) basic videos via this site(the blurry image at the top of this page). Hope the simple "new" way of making videos helps to make this video a bit more enjoyable.
Thanks for stopping by.
HeArtfully Creating,
Anita