Showing posts with label personalized gifts. Show all posts

Friday, February 10, 2017

PRACTICAL POLYMER CLAY PROJECT: Quick Polymer Clay Gift Idea For Men from HeArtfully Creating.

What to do when you suddenly discover a birthday celebration for someone you really admire posted in a local paper, but you missed it until the night before? Well, in our case, my husband could go and I couldn't. So his job was to make a handmade greeting card ASAP and my job was to make a gift using what I love working with, Polymer Clay.
Watch The MR.70 Video Below:

Because we really love this guy, if we had had more notice, I would have  worked on one of my really fun, but time consuming figurines. This guy is actually a hero to many of our peers. But, that gift idea was off the table. Hmmm....What can I make in a few hours for our friend that would be personalized and masculine? You see, as a girl (a 51 year old one :o) I tend to have no problem coming up with girlie ideas. Makes sense right?!
Why Key Chains Of Course!
If you ever have a rush gift idea where you do not want to buy something (way to easy and not personal enough - to me anyway), what works for males and females? Why Key chains of course! After all, pretty much all humans have a key, at least one. No, they may not use it, but it is at least a way to make a personalized gift. They can use it on a zipper pull or as a backpack tag or just throw it into a drawer. It is up to them. Nevertheless, it is a personal handmade gift, made HeArtfully from you or me!
What Are The Ingredients?
💗To work on: A Glass, silicone, or ceramic tile works well to work with
💗Tools like, assorted ball tipped and needle tools. OR, you can use a toothpick, needle, skewer and a straw, look through your junk drawer. Awe, come on, we all have one! :o).
💗For "MR.70," I mixed a gold glitter polymer clay and some neutral metallic clay in PREMO brand.
💗Unbaked clay adheres to unbaked clay, but since I purchased Sculpey's Bake and Bond, I used that to make sure connecting parts were essential "glued" together. It isn't critical.
💗I love the assorted collection of steampunk metal gears and such. They add a masculine touch in a quick and easy way.
💗For the keychain, I keep the findings or hardware for items like keychains and such on hand.
💗For metallic surface effects, aside from the clay colours, I also added Gilders Paste and Mica Powder. Then to antique it a bit, I used acrylic paint in an indigo.
💗 Ceramic tiles are cheap and easy to get at places like Home Depot. I bake all my pieces on a dedicated baking pan, with a ceramic tile set inside. A tent of tin foil or an aluminium cake pan works well to protect your piece
💗Cardstock or a recipe card works well to place your piece on. But place that on the tile.
What Kind  Should I Make?
The next question is what would be a good design? In my mind when designing a key chain, it is important to make sure it isn't too ginormous so they can use it.If you want them to have the option to use it, think of what size would be practical for you.
As always, it is best to sketch out ideas for the shape. If you know any themes that this person likes, then incorporate that into your design. What colours do they like? What are their initials and their new age?
If they love turtles, then make a turtle themed piece, if you don't have any idea or want something more simple and sleek, then what I did was to work with his initials and age. My husband knows him better than I do, so he told me he likes motorcycles. He actually said that after I had already made the keychain. So before firing it in the oven, not only was I able to translate the zero into a motorcycle wheel, to add to the masculinity, I added more steam punk type gears. As well, using some tools, (a straw would work), I was able to imitate screws. Then with a toothpick, tiny ball tool, and/or a needle tool, I impressed marks to add fun details just to enhance the piece.
Finishing Touches
Once MR. 70 was complete, I used my finger to rub on an antique gold Gilders Paste and a shimmer of mica powder. Once baked for about 60 minutes at 375F (I learned baking all clay at least an hour makes it stronger- from Polymer Clay Tutor). I let it cool completely and painted on Acrylic Paint In Indigo. Then I wiped it off. That way it goes into the crevasses and indents giving it some dimension and depth.

Once done, I added a clear coating of whatever  I have on hand that works on clay. It is to just protect the mica surface. But, you do not have to use anything.

All Done and Ready To Give Away!


Share Your Work with HeArtfully creating on our new Facebook Page!
I am always inspired by the work that other people do. Inspire others or share just to share. Meet us at HeArtfully Creating and upload photos of your art work. It can be anything, paintings, drawings, sculpture, felting, jewellery making, carving, collaging....cake decorating counts too. Anything that expresses your creativity.
Disclaimer: H.C will not permit posts that are to promote sales in a shop or to raise funds.

Please "LIKE"and Share HeArtfully Creating Here on FACEBOOK 

Thanks for stopping by.

Monday, June 20, 2016

Practical Polymer Clay Project: Happy Dad's Day - Gift Idea - A Hybrid Faux Stone "DAD" Key Ring

2016- Faux stone from polymer clay - key chain for my Dad made by me!
Yah, I know it is the day after of D-Day (Dad's Day), but I still want to share what I tried to create for my Dad. He loves rocks. In fact he and my sister have risked life and limb to get some good rocks via Lake Superior. (Hope I got that right)
When you want to make a gift for someone, it helps to try to focus on coming up with an idea based on what  you know the gift receiver likes. It just makes it more meaningful and might please them. Mind you, anything handmade from a friend or family member, is always meaningful!
Faux Stone or as my mom calls it "Fox" Stone, means "fake" in English. Faux is a French word.
Rock, Stone, Gemstone?
When you want to try to make your clay to look like a specific surface, such as faux stone It is best of
course to have a reference point to look at. Or just make it up. That is what I did. Nope, I just worked from my memory and instead of getting a Jasper stone surface, I have a hybrid, (made my own kind) a cross between granite and jasper.   Here are some samples of granite and jasper types. As I looked them up, I was inspired to try more re-creation in poly clay.  As well, below are some great links about other stone types as well. Be inspired....
Click this link to learn more about granite.
Click Here to See Rock Types
Click here to see the many varieties of Stone including gemstones

I am sorry I didn't take any how to or works in progress photos. But,  here are the basics incase you might be inspired to try making a personalized key chain.
What I Did
1. Smooshing Colours:
We all know what it means to smoosh right? As an artist, colour mixing is one of my favourite things to do in the art making process. When I use paint, I use a paintbrush. But when I work in polymer clay, I smoosh. That means to take the colours you want to combine to get another colour, like blue and red make purple or red and green make brown...and mix it together until the colours are well combined into the colour you want.
Depending on the kind of colours used for mixing, your end results may surprise you. If it isn't what you wanted, do not give up. Keep adding and subtracting. I don't do this, but I know other clay artists who like to keep records of "colour recipes." Where you might either make a sample of the colours you used and how much of each, to result in the colour you wanted.
This works well, if you want to get the exact same mixed colour every time. Maybe it is the visual artist in me, but, I like to eye ball it. Mind you, that means I never seem to get the same colour twice. As well, I often run out if the project is large. So mental note to self, "make sure I mix A LOT of the colour I need.
2. Colours used? In this project, my goal was to create rock like surface. That means I then took the colours I "smooshed" together, made ropes, thick, thin or use chunks of colours I thought might make a great faux stone look. Then do some smooshing, or twisting and folding and twisting. The goal is to marbel-ize the clay, creating that rock look. Be careful not too over smoosh the colours or else you may cross the line from marbleizing and effects to a whole new colour mix.
3. Shaping It. In this instance, my goal was to make a personalized key ring for my Dad. So, it makes sense that I wanted it to spell "DAD." My husband had the idea to cut "DAD," out of the clay instead of making each letter and trying to connect them into one piece. I tried Craig's idea and that is what worked.
You can shape it how ever you want.
4. Armature or Support: I forgot to say that if you want your piece to be extra strong, you can place a sturdy 18 gauge wire inside the piece. This piece has a wire running through some of it to strengthen it. At least I think I did. My memory is a tad foggy.
5. Texturizing: Once you have the shape you want, then it is time to create a rock surface.
2016- Faux stone from polymer clay -
key chain for my Dad made by me!

Some rocks are polished and shiny. Natural rocks usually are never polished and shiny. For my keychain, I wanted the stone to look as if it was hand cut or carved and then ground down to a semi smooth surface. How to texturize a stone surface. You can use an old toothbrush, sandpaper (just push rough sandpaper onto the clay surface. You can use a needle or pointy tool and literally dab the clay until it looks how you want. I used a spiral bristle tool that looks like a giant mascara brush.
6. Rings and Do Dads: I wanted to embellish the clay to make it interesting. Using a drop of liquid polymer clay, I set in a steampunk gear and poked some details into the clay. As well, I needed a place to suspend the key ring attachment so, I inserted a large metal steampunk gear ring.
Also, while the clay was unbaked, I added some light touches od shimmery mica powder for fun and pizazz.
7. Finishing Touch Ups. Once the clay is baked according to package directions on a
2016- Faux stone from polymer clay - key chain for my Dad made by me

ceramic tile, tented with a foil piece or foil cake pan and it is cooled completely. You can sand it a little and buff it up a bit. Or leave it as it is...or you can use a polymer clay compatible glaze in the finish you want. I used a renaissance wax to protect it.
7. Gift It!
2016- Faux stone from polymer clay - key chain for my Dad made by me!

2016- Faux stone from polymer clay - key chain for my Dad made by me

Tuesday, January 19, 2016

Purposeful or Functional Art: Personalized Greeting "Cards"- Part 2

A Work in progress, not complete. Illustration by Anita Berglund
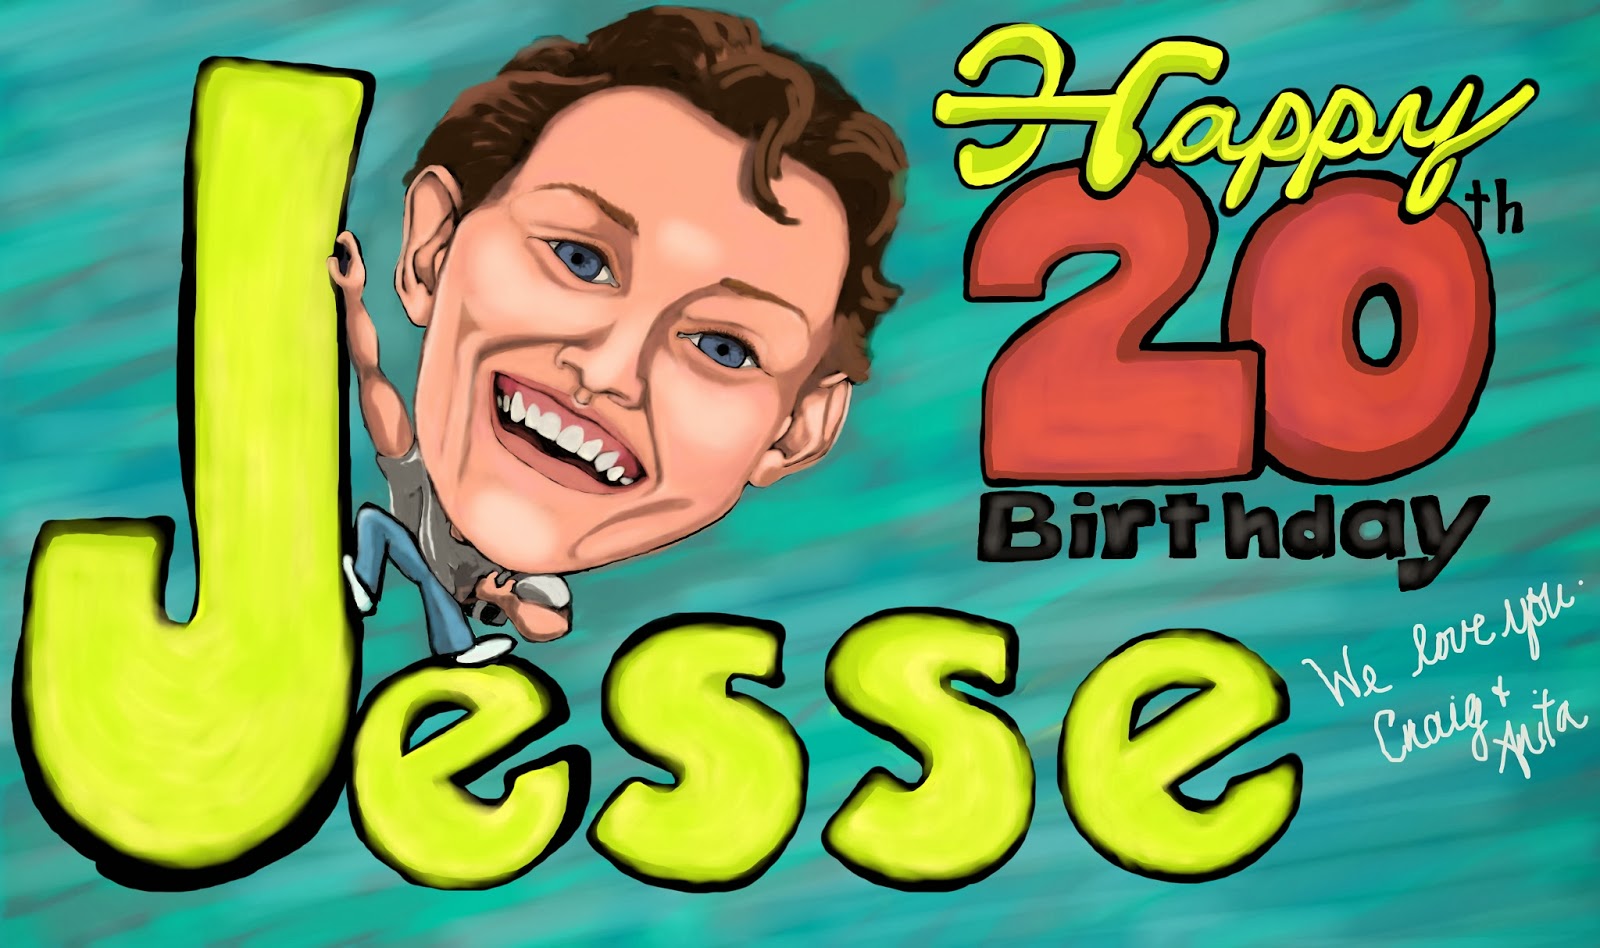
Okay, I shared just a few examples of the original greeting cards I made years ago using traditional methods. Remember paper, pencils and markers! These days I have bee using my computer to draw and paint images. Something that I started out doing for fun was to take photos of friends and family and open the photo up into a drawing/painting app like Sketchbook Express. And then....I just embellished a lot! Adding costumes and backgrounds. So you can see some of the process I  am posting a series of before, during and to the finished result images.
Print Anywhere!?
What is great about digitalizing your work by drawing digital or scanning your work into a jpeg file, you can email your personalized, original art work to the recipients. And they can do what they want with it including making it wallpaper on their computer, print it out in whatever size it can be. If you go to printing web sites you will see original images on t-shirts, mugs, posters, calendars, pins, pretty much anything you can print on.  That is something you might want to consider if you want to make gift that way.
Have Fun!
When you create heArtfully, you are enjoying, even loving what you are doing and that means it won't feel like a chore. As well people care if you take time to create something personalized just for them. So if you don't already make your own cards and gifts, I encourage you to.
Time To Share...

This is a compilation of faces from photos of family members- Illustration by Anita Berglund


Family members of ours who went from this...
To this...
To This...
To the final result, this! Illustration by Anita Berglund

Here are my parents before...
Add caption Illustration by Anita Berglund


Mom and Dad again...I collaged a pile of old photos and had some fun....
Here Was the final result! Illustration by Anita Berglund
Wanting it to be perfect, I was happy that it turned out pretty good. Always room to perfect! Illustration by Anita Berglund


Here is the before process....Illustration by Anita Berglund

Monday, January 18, 2016

Purposeful or Functional Art: Personalized Greeting Cards- Part 1

We can make art to hang on your wall or display like a sculpture but some of us like to use our art making ability to create what I call "practical art" or functional art. Meaning art that can be used for something, purposeful...useable art.
Since I have been focusing on working in polymer clay these days, examples of purposeful polymer clay art could be.... candle holders, decorate a vase, provide a grip for tools like crochet hooks, polymer clay tools, decorate and glass, metal or wooden surface that holds balms, solid perfumes, do-dads and the like.
Using artwork to explain or teach something
And then two dimensionally speaking, to me, practical or purposeful art could be anything that is created to be used for something more than looking at in an Art gallery or on your walls. Examples I have used my 2D art have been for uses like illustrating story books to help tell stories or to teach someone how to do something like the tutorials I drew on the left. As well, in order to waterproof my husband's wheelchair tote bag, so I painted a landscape across the bottom, check it out below.
My husband's functional art by me!
And then there are the times when I have decorated useful items like picture frames and personalizing a jewelry box! The possibilities have been endless...drawings for advertisements to be used in print media like a newspaper, church bulletins, logo design, drawing images for posters and other advertising methods and all that fun stuff
Let's Get Personal
I think you get the idea. Today, I want to talk about making personalized, one of a kind greeting cards. Sure anyone can buy a card from Hallmark, but when you create your own special occasion or just because card to celebrate someone, there will never be another one like it anywhere! I do confess that my motive over the decades, besides having fun, has also been to save money. Have you seen the price of those store bought cards?!

There are a bazillion tutorials out here in web world about card making. There are many who like to work in scrapbooking mode, i.e.: stamping and inks,  paper cutouts, glitters, embossing powders, stickers and such. All fun but for me, I want to share the Old fashioned" way my personalized cards were made, using card stock, pencils and markers, along with glitter glue!

This is called part one because paper and markers were the original way many of us made cards and many still prefer that way.
So check out samples of a few of countless personalized and generic hand drawn cards that I once did with great joy!

A drawing I did in clay to make a texture plate!

These days, my personal cards can be done digitally, Check out the original article "Drawing With A Mouse" to see the first article on the subject.  For now, here are some past functional art pieces. Be inspired. We'll see you in part 2 next time!