Showing posts with label mica powder. Show all posts

Tuesday, November 10, 2020

Learn With Me Mixed Media -Alcohol Inks, Glitter, UV Resin And Such.

 Hi guys! I was able to create another video regarding working with mixed media. It's a very long process so I didn't want to bore anyone by filming every step of the way. So this video is a bit more of a learn with me/tutorial as I ramble on about whatever pops into my head. Tried to edit some of that out, didn't think anyone would really want to hear too much about Star Trek versus Star Wars!

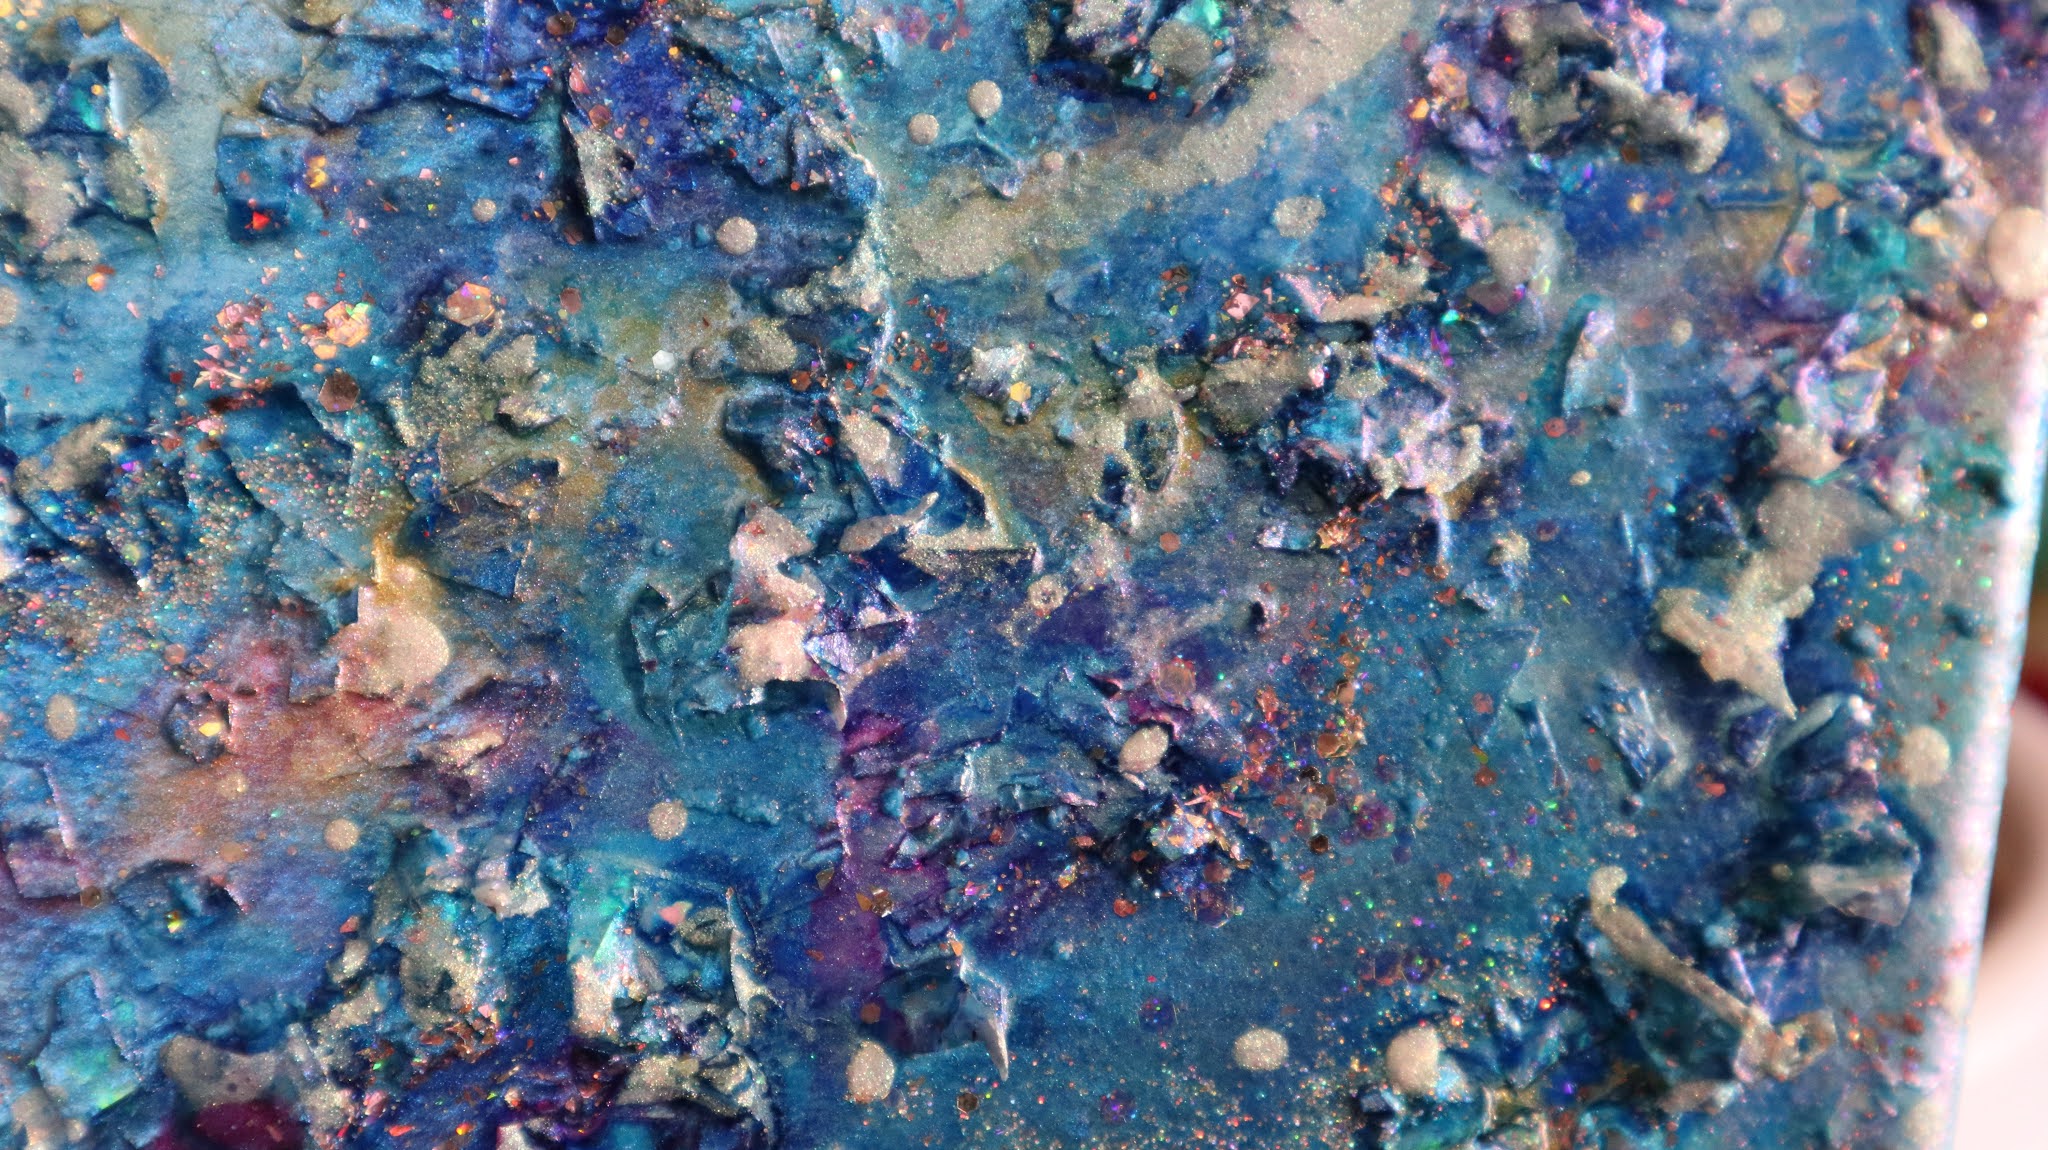
The materials that are used for this piece so far. That's right I am still tweaking it so it can't be considered done. In fact I've got some still shots then I'll be posting soon to see you what I've done since this video was made. It's just so much fun adding layers of textures and resin  and color.

Watch my new video here below


Materials I used

Stretched canvas about 5 x 7"

ALCOHOL INKS

POLYURETHANE

UV RESIN

LOTS OF GLITTER

ACRYLIC MEDIUM

MICA POWDER OR PIGMENT POWDER

GLOW-IN-THE-DARK POWDER

MICROBEADS FROM THE WORLD OF NAIL ART

CELLOPHANE CHUNKY GLITTER

ACRYLIC PAINT PENS

GLITTER PAINT PEN


REMEMBER WHEN IT COMES TO ART MAKING THERE AREN'T ANY RULES. WELL DEPENDS IF YOU'RE IN ART SCHOOL AND YOU HAVE AN ASSIGNMENT LIKE I REMEMBER FONDLY, THEN I HAD TO FOLLOW MY PROFESSORS RULES. BUT THAT ASIDE IF YOU'RE NOT UNDER A PROFESSOR, YOU GET TO HAVE FUN.


Connect More

.


Tuesday, November 26, 2019

Create Your Own Shimmery Alcohol Inks


Finally, here is the video about how to create your own shimmery alcohol inks. A substitute or compliment to the new Ranger Pearl Inks with mica powder. I am sure many of you have already thought about doing this. Just incase you haven't, here is what I did. As well, a bit of a review about the types of pointy tip bottles I like best.
Watch Below!

A bonus is the latest look at our ever changing kitchen table top using the shimmery inks.
Materials

Here are links to the various bottles I used to hold my mixed inks in as well as links to some other materials like a decent deal on mica powders if you just want to start out.
Polyurethane - Polycrylic
Long skinny small tip bottles
Darice Squirt Needle Tip bottles that leaked all over
Metal needle tip ink bottles
Deco Art Bottle
Holographic fine glitter
99% rubbing alcohol -walmart
Ranger Pearl inks
Mica sample box

Connect More

Friday, November 22, 2019

The Unending DIY Galaxy Kitchen Table Top Transformation

I have finally concluded that our tabletop transformation will not end. However I want to share the ongoing process in that transformation. As well, Today I want to share a little bit about my discoveries regarding creating Shimmery alcohol inks that you can create on your own. The idea was sparked by the new pretty Ranger pearls. Alcohol inks that  have Mica powder in them to give them a shimmer.  It is 100  percent possible to create a shimmery alcohol ink that you can use on whatever surface alcohol inks adhere to.
Watch Video Below

In my case, I have added links to my supplies used For this table project.
Hope you're inspired to create your own surfaces  and If you want to create something smaller than the tabletop, You can also make mini galaxies and paintings on canvas using the same materials. I also have that project on the go as well.

Materials
Here are links to the various bottles I used to hold my mixed inks in as well as links to some other materials like a decent deal on mica powders if you just want to start out.
Polyurethane - Polycrylic
Long skinny small tip bottles
Darice Squirt Needle Tip bottles that leaked all over
Metal needle tip ink bottles
Deco Art Bottle
Holographic fine glitter
99% rubbing alcohol -walmart
Ranger Pearl inks
Mica sample box

Connect More

Wednesday, July 18, 2018

HeArtfully Creating:Polymer Clay Journey - My First Gemstone Ring


Handmade fantasy art ring using polymer clay and chalcedony gemstone.By Anita Berglund

Happy summer guys! Have you been creating in some form or other? Hope so.
It has been a fun artistic summer so far for me. Between creating one of a kind figurines,(see here) I have been experimenting with polymer clay and gemstone pendants (coming soon) and yesterday, a new gemstone ring idea. 

This ring was totally whimsical, no pre-planning at all. Never been good at pre-planning. Because I love taking photos of what I make, I have a video below that features all angles of this pretty fantasy ring. I call it a fantasy ring or even cosplay because it has that look to it, some swirls and sparkle and a large glowing gemstone in the center! The ring itself,  was formed around a metal  cannoli cylinder. You can use any cylinder in the size you want, just wrap it in wax paper first and tape or it will be tricky to remove. For the base, I used white Premo and translucent clay and an aqua  chalcedony onion briolette gemstone with facets (about 12mm across). 

To be sure it was secure, I pushed the pointy part into the clay and surrounded it with a clay bezel and some embellishments. Unfortunately, I ended up losing half the stone in the clay. Chalcedony is an amazing stone that glows when light is near. You don't need a stone to make a ring, or you can make a faux stone out of clay or even a resin gemstone (that must be oven safe.) Then before curing in the oven for 1.25 hours at 275F, I coated the clay with a beautiful shimmering, metallic chrome nail art powder. I assume the born pretty nail art powders are mica, but am not a hundred percent sure. Hope you are inspired even a little to try creating a polymer clay ring.
See More Photos - Watch Video  Below!
HeArtfully Creating,
Anita

Be sure to share your creations with us at our Heartfully Creating's Facebook Group

"LIKE" HeArtfully Creating Here on FACEBOOK

A BERGIE CREATION - at Etsy, my handmade jewelry shop

ABC On Twitter

Saturday, March 3, 2018

Polymer Clay Journey: Pressed Texture Bead Video Tutorial

Watch How To Make Pressed Texture Beads Below
Hello everyone! Hope you have been creating in whatever way shape or form you prefer. Today, I want to share a video tutorial, a very simple one at that  - about how to make some very simple and beautiful polymer clay beads. Beautiful because they are textural (click here to see my previous articles on making texture plates and rollers) and enhanced with pigment powders. Since I adore chrome chameleon nail art powders and flakes, that what I used. As well as, the forever tried and true, mica powders. If you don't have these powders, you can use sparkly eye shadows. Just don't use them on your eyes after.

You Will Need
💕conditioned polymer clay
💕Texture sheets or stamps
💕bead pins for piercing holes and baking
💕Pins or needle tools, and/or toothpicks or bamboo skewers
💕Mica, nail art and/or pigment powders
💕baking pan
💕card stock folded into a fan fold to lay beads on to bake
💕a bead baking rack or hand made one (skewers or stiff wires running across a baking pan -see my original one here)
💕Aluminium pan or foil to cover beads in oven
💕Ceramic tile to lay on bottom of pan
💕water based stirred polyurethane or glaze suitable for polymer clay
💕An oven set to 275 f if using Premo

HeArtfully Creating,
Anita

Subscribe! Like and Share!! (if you want of course :o)


"LIKE" HeArtfully Creating Here on FACEBOOK

Bergie Creation Shop Blog


A BERGIE CREATION - at Etsy, my handmade jewelry shop

 LIKE ABC On Facebook

ABC On Twitter

YOU Tube Channel

Pinterest


Wednesday, October 25, 2017

Polymer Clay Journey: Lessons Learned - Bacon, Corn Flakes or Leaves? You Decide.

 Bacon, Corn Flakes or Leaves !
Keeping with the autumn theme, I had a great idea.... I cut out and hand textured some small leaves with my craft knife. Thought the clay mix of translucent with alcohol ink, would look really cool if I made varying shapes and baked them on a jar. As well, coating the surface partially with a golden mica powder.
Dimension!
To make sure they would  be interesting, I carefully lifted and shaped each leaf, giving it a more realistic texture.
Then I had the "brilliant idea of pushing on some clear embossing powder. Well, doing it after texturing and positioning them on the jar, was probably the mistake that made my leaves like corn flakes. They are too bumpy and icky looking!

Take a look and see  how dastardly they turned out. But that is how we learn. If we don't experiment, we won't know what works and what doesn't.

Thanks for stopping by.
HeArtfully Creating,
Anita
Bacon, Corn Flakes or Leaves? You Decide.


bacon !


bacon !

bacon !

bacon !


bacon !


Subscribe! Like and Share!! 
(if you want of course :o)

LIKE HeArtfully Creating Here on FACEBOOK: https://www.facebook.com/HeArtfullyCr...

HeArtfully Creating Blog:
http://heartfullycreating.blogspot.ca...

A Bergie Creation Shop Blog: http://abergiecreation.blogspot.ca

A BERGIE CREATION - my handmade jewelry shop
www.abergiecreation.etsy.com

Facebook:
https://www.facebook.com/abergiecreation

Twitter:
https://twitter.com/abergiecreation

YOU Tube Channel
https://www.youtube.com/user/anitaand...

Pinterest:
https://www.pinterest.com/abergiecrea...
Autumn themed clingies

HeArtfully Creating:
http://heartfullycreating.blogspot.ca

Sure Hope Gazette:
http://surehopegazette.blogspot.ca

Walking Way Overrated
http://walkingwayoverrated.blogspot.ca

TUMBLR
http://anitaberglund.tumblr.com

Friday, July 21, 2017

HeArtfully Creating: Polymer Clay Journey - More On Mica POWER!! Yes, POWER!

It is easy to see why so many of us love mica powder, because colour has POWER! When it shimmers and sparkles, it has even more power! I didn't get to share my powder swatches on the black and white clay in my last Mica Swatch article/video -click here to see -so here they are. It is worth checking out how Mica powder or other powder pigments change depending on the background or surface they are laid upon.

Experiment, have fun. If you don't have jars of powder, inexpensive eye shadow, works well on raw polymer clay as well. Try layering colours as well. For added effects, you can use rubbing alcohol on a swab or sticky packing or scotch tape to remove the powder.
Watch Below:
Mica Power!

HeArtfully Creating!
Anita


Subscribe! Like and Share!! (if you want of course :o)

LIKE HeArtfully Creating Here on FACEBOOK: https://www.facebook.com/HeArtfullyCr...

HeArtfully Creating Blog:
http://heartfullycreating.blogspot.ca...

A Bergie Creation Shop Blog: http://abergiecreation.blogspot.ca

A BERGIE CREATION - my handmade jewelry shop
www.abergiecreation.etsy.com

Facebook:
https://www.facebook.com/abergiecreation

Twitter:
https://twitter.com/abergiecreation

YOU Tube Channel
https://www.youtube.com/user/anitaand...

Pinterest:
https://www.pinterest.com/abergiecrea...

HeArtfully Creating:
http://heartfullycreating.blogspot.ca

Sure Hope Gazette:
http://surehopegazette.blogspot.ca

Walking Way Overrated
http://walkingwayoverrated.blogspot.ca

TUMBLR
http://anitaberglund.tumblr.com

Tuesday, April 25, 2017

Polymer Clay Journey: Tips And About Primary Elements Pigment Powders


Primary Elements baked after powders were  mixed with a tad of moisture.
Hi guys! What have you been creating lately? Me? Well, always working on something when I can. Spent about five days recovering some illness, so my productivity was down - that always bums me out. But thank the Good Lord, I am back up to par and ready to get back to work. Keep in mind,
Primary Elements
creating for me is not "work," because I love it!
Primary Elements Pigment Powders - Surprise! 
Primary Elements before baking (I did sprinkle clear
embossing powder hoping to keep it sealed.)
If you are like me, you love adding or incorporating powders to polymer clay. Whether they are glimmer and shimmery like Mica powders or more pigmented powders like chalk pastel or Primary Elements, which are more of a shimmery mica but a pigment. I learned the difficult way that Primary elements can not really be used like Perfect Pearls. I added a colour to the back of a piece, baked it and when I went to glaze it or got it wet, a new colour appeared, it altered.
Primary Elements are beautiful, a little goes along way when added to a medium like water and arabic gum or a liquid polymer clay, or glaze. But, on their own, added to the surface of unbaked clay, they are unstable - meaning the colour can change if water hits, not to mention depending on the hue, the colour may alter to something you
didn't want. You may experience great disappointment when the surface treatment completely changes or seems to come off after baking. Where as mica powders and chalks, don't generally wash off. They adhere to the surface quite well. It may help to seal them in if you don't want any wear off, if it is a jewellery piece.
How Can I Use Them Then?
These can be used in teeny amounts to make paint. Just add a bit to water and you will have shimmery colour to spray on paper or evenly. Let it dry, but, it still might rub off, especially once the clay is baked. But apparently adding some Arabic Gum to the water, binds it together. I am not sure if it will then stand up to Polymer clay.
As well you can have great fun, mixing it into gel mediums or glazes. They act as a binder and will stay on the surface you put it on, including already baked clay. I wouldn't use colour glaze or medium
on raw clay. But you can experiment!
Swatch Out Colours
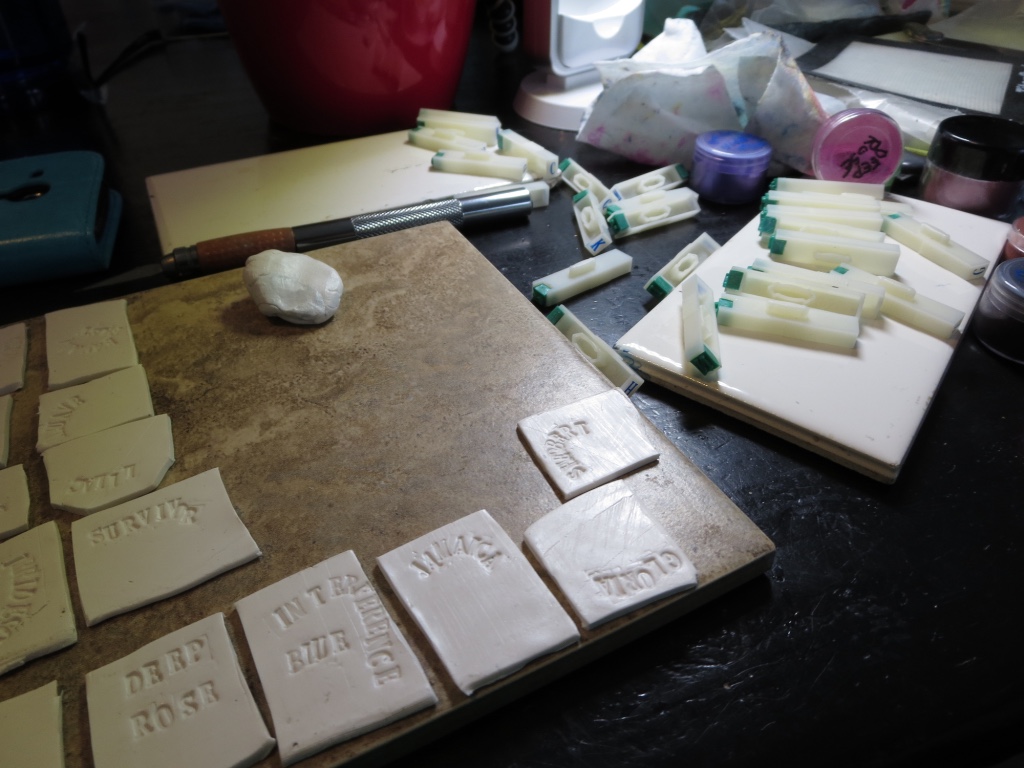
 I wanted to show you how I rolled out back clay and in some cases, I used white too. You may already know that depending on the colour of the clay, the pigment and mica will have varying results. So it is worth swatch out both colours.
Using rubber letter stamps, I stamped the name of the colour into the wet clay. Cutting the sheet into sort of rectangles. Added the Primary Elements Powdered Pigment that is also mixed with mica shimmer powders. Then to get the true colour, I delicately added a bit of water and just used my fingers to mix it on the surface. Wanting it to not rub off, I sprinkled clear embossing powder on the surface. That s why a couple pics look like they have course sea salt on them!
Fired the clay at the Premo Temperature of 275F. You can use the swatches as a colour reference, attach them into a notebook or throw them into a baggie. I am not super organized :o)
Have fun, experimenting. 
Note:
These Pigments are intense and therefore, will seriously stain fingers. You can purchase finger cots, or cut the fingers off of latex gloves (same thing), or thanks to Val Evans from the Unruly Housewife, you can wrap your finger in cling film.

Have fun! Experiment! Even making colour swatches is mega fun!

Baked on Primary Elements (remember with a sprinkling of clear embossing powder to seal it from making a mess)
Subscribe! Like and Share!! (if you want of course :o)

LIKE HeArtfully Creating Here on FACEBOOK: https://www.facebook.com/HeArtfullyCreating/

HeArtfully Creating Blog: 

A Bergie Creation Shop Blog: http://abergiecreation.blogspot.ca

A BERGIE CREATION - my handmade jewelry shop

Facebook:

Twitter:

YOU Tube Channel

Pinterest:

HeArtfully Creating: 


Wednesday, March 15, 2017

Polymer Clay Journey: Works In Progress And More Glazing Lessons Learned

Howdy guys! I've noticed that Wednesdays are often referred to as works in progress days. Well, I've noticed that in the polymer clay world anyway. It is where people share pieces that they are working on but are not done yet. So this is my first works in progress Post, I think so anyway. Maybe more like works I thought were completed, but then started to take photographs for my online Etsy shop, but noticed, thanks to direct sunlight and macro photography.... the Tiny little bubbles and flaws in the polyurethane gloss! This time, I thought I was so careful. And some of the pieces have yellow spots. Again, does anyone out there have any ideas as to what I am doing wrong? Too much at one? Should it be a really thin layer after layer? All that then means, the pieces I thought were complete and ready to prepare for sale, are not. Argh!

Polymer Clay Earring dangles, with copper,
handmade (by me) ear wires. 
Back to my works in progress. Been working on textured, polymer clay "dangles," created using my own texture plates/rollers/sheets (Here is article 1, 2 and 3 on making your own texture/image sheets and rollers) , whatever you want to call them. The first piece has, thanks to the inspiration of Christi Friesen's polymer clay art work, where she talks about incorporating inclusions, which is anything not made from polymer clay. I incorporated items like micro beads and a small faceted Glass bead. The surface was then treated with Mica Powder, acrylic paint, and finished with that frustrating water based polyurethane. I thought it looked great at first, but then as you take the photos under direct sunlight, then you see all those darn bubbles...teeny ones!


Here are a pile of some more photos of some of the pieces that I turned into earrings. I think they look pretty great, as long as I don't zoom in with a macro lens! Maybe I am being too picky. Oh
Polymer Clay Earring dangles, with copper,
handmade (by me) ear wires. 
well, it is important to perfect my work so customers receive professional wearable art! Creating is always a learning process.
Thanks for stopping by.
HeArtfully Creating,
Anita
Polymer Clay Earring dangles,
handmade (by me) ear wires. 


Polymer Clay Earring dangles, with copper,
handmade (by me) ear wires. 

Subscribe! Like and Share!! (if you want of course :o)

LIKE HeArtfully Creating Here on FACEBOOK: https://www.facebook.com/HeArtfullyCreating/

HeArtfully Creating Blog: 

A Bergie Creation Shop Blog: http://abergiecreation.blogspot.ca

A BERGIE CREATION - my handmade jewelry shop

Facebook:

Twitter:

YOU Tube Channel

Pinterest:

HeArtfully Creating: 

Friday, July 29, 2016

HEARTFULLY CREATING: TRYING OUT PEBEO FANTASY PAINTS VIDEO

Yay, here is the  video I mentioned last week about what I did with Pebeo Fantasy Paints! So far I love the cool effects they can create but, polymer clay remains my favourite medium. However, I definitely recommend trying out any new art making materials that you want. Creating is all about having fun. I recently told a frustrated young artist that making art is about having fun. and not something torturous. It was his first time drawing and I think he thought he had to create photograph like image. Hopefully he knows now that if he isn't enjoying art making, then maybe he's  trying too hard! Relax, have fun and experiment with different media or art making tools. You may find something you jut love doing or find out you love a little this and a little that!
HeArtfully Creating!
Anita :o)

Want To See More About My Pebeo Experience? Watch My New Video Here!


Thursday, June 30, 2016

POLYMER CLAY ADVENTURE: Works In Progress- Howard The Turtle Part Two

You met Howard last week. Click here to see. As with most of my polymer clay adventures, it takes weeks some times to complete anything. Believe it or not, this guy is about to get his fourth "face lift." What do I mean? Well, look at this face and then when I post the next article, you will see the change. It is so important to me, to make him as perfect as possible.
My husband just learned that turtles are reptiles. I got to say, "I told you so!" They can live under water, that is what makes them NOT amphibians, like he thought. Did I know that? The reptile part, yes. The reason why. Nope!
Since We Last Met...
Hope you are a wee inspired to create or at least something here makes you smile!I also have been carving pieces away with a sharp craft knife. Be very careful. Cooked clay carves easily. It is a tad addictive! 
Here is how Howie is looking as of now.
Howard the Turtle in progress. Made using polymer clay, with black onyx eyes and liquid clay.
By me, Anita Berglund

Decided to change him from a Sea Turtle to the authentic turtle from CBC's Razzle Dazzle kids show in the early 60s. There are his stubby legs.


I've only Just begun....


I layered multiple sheets of clay to create a mokume-gane cane stack to cover Howard's shells.

sliced and ready to be used....

Howard needs a shell!


Liquid clay, silicone shaper and sharp blades to slice the mokume-gane cane. Used cover the pre-baked shell.


Howard the Turtle in progress. Made using polymer clay, with black onyx eyes and liquid clay. By me, Anita Berglund

Howard the Turtle in progress. Made using polymer clay, with black onyx eyes and liquid clay. By me, Anita Berglund


Baking his shell...


 Oven Temperature Matters!
I foolishly baked Howard's shell at 375 fahrenheit instead of the required 275F! Oops! All the dark brown parts below are scorched and crispy. I am surprised, I didn't smell the fumes or see smoke. Thankfully, it was on a 30 minute timer. Mental note, ALWAYS double check your temperature before baking polymer clay!
All scorched at 375 Fahrenheit!!

All scorched at 375 Fahrenheit!!


I also have been carving pieces away with a sharp craft knife. Be very careful. Cooked clay carves easily. It is a tad addictive! 


Let Cool Completely!
I made the mistake of fiddling with Howard's toes while he was still hot from the oven and OOPS! I  lost a toe :0(

HeArtfully Creating,
Anita