A place to encourage the creativity of artistic minds of all ages. Offering Ideas, Inspiration and Instruction and sharing the work of others who inspire me!
Hi artists of all ages! Hope you are enjoying your week so far. It has been a busy time as I frantically try to complete some extra special projects for some extra special friends, Check out this post to see what I am talking about.
Between that project and others, I was able to post a new basic video tutorial about creating stamens for my polymer clay flowers using the "ball to cup" style. Yes, I made that up. Not sure what to call that technique. Any ideas?
So take a watch below if you want to learn a lesson you may never have jeard of before. The lesson is a bonus along side the stamen one :0)
Watch Below!
Hope you are creatively inspired even a little.
Thanks for stopping by!
HeArtfully Creating
Anita
Guess what? I have been a tad hooked on creating faux stained glass window decorations. Right now our front door looks all bright and summery even though it's a typical white, winter day! As soon as I am ready, I will be making a new video. But for now, to brighten your day, I wanted to share a few sneak peeks of the newest creations.
Enjoy!
HeArtfully Creating,
Anita
Hi guys. Here is the updated faux stained glass video. The last one had annoyingly loud music so you can't hear the tutorial very well. Click here to see the written part of m tutorial.. Watch And Learn
It is another day closer to summer! Depending where you are, there are early, mid or late spring flowers. Here in Thunder Bay, our spring garden didn't fare well. Out of about sixty tulip bulbs planted, we had about two! Yes, we fertilized when we planted them :0( As well, our crocuses, (or is it croac-eye?) and daffodils are no more and it looks like our large oriental poppy perennial plant is surrendering to the same fate as the spring bulbs! Clearly, I stink at gardening. It doesn't help that our entire street, right next to our garden was all dug up for about 2-3 months last year. But, the odds are my green thumb lost all circulation and shall not flourish. (Hey "Flourish," that makes me think of dear Christi Friesen's book of that title)
On That Note...
Polymer Clay bloom by Anita Berglund
Since I can't make our garden flourish or even grow, I can keep creating faux flowers using polymer clay or other materials like fabric! So I just wanted to share some new pieces I have recently been working on, hoping to inspire you. If you can't grow an actual garden of flowers, you can flood your home with handmade botanicals whenever,
A few years ago, I discovered how to make flowers out of satin, taffeta and organza fabrics. It became a bit of an addiction because I got to melt the edges of the flower pieces with a tealight candle. Needless to say, I went through about fifty to one hundred candles! It is risky, easy to burn the fingers. But you can make such beautiful flowers, it is worth it all. It is a great idea for bridal fashion accessories as well as for special events like the prom or graduation. You get to pick the color And if you want it shiny use satin, if you want it not so shiny, use taffeta. To add dimension you can use organza. Or you can make it all out of organza For a very delicate Look.
The flowers I made that you will see in the video, were created to be versatile. That was made possible by sewing a piece of fabric, making a loop on the back. Then you can add a brooch pin, Bobby pin, neck Choker, A Barrette blank...attaching it wherever you like. Except it doesn't work for hair elastics or head band elastics because they are closed loops. So as you will see in the video, for some of them I either sewed the elastic to the back of the flower directly or I made a loop using fabric and Velcro, making it even more versatile because you can open and close it around something. Watch The Video Here:
These flowers can be made however you like. You can just cut circles or circles that have petal shapes around them, You can make the petals rounded or pointy. You will need to experiment with it when you melt the edges of the fabric because I tried smaller petal cuts and a lot of them just melted away into nothing. I found that a circle and rounded edges works best for the flowers.
Caution to Youth: Because this involves a flame, please do not try doing this alone, if at all. We can make flowers without a candle flame. Much safer. Flower Making Tips:
Size: Remember if you want a flower that is about 2 inches across, to cut your circles or shapes a little bit bigger because the edges will curl up when they melt as they curve up. Therefore making your flowers smaller than the original cut shape.
To make a fuller flower make more layers of circles In varying sizes. Then when you assemble the flower you have more rows of petals, making your flower fuller. Materials Needed:
💗synthetic fabrics like satin (I used some old pj's), organza and tafetta.
💗Scissors
💗A marker if you want to trace out circles or flower petal shape circles
💗A sewing/beading needle that fit through the beads you use to make the center of the flower
💗Assorted beads or a focal button. Think of what you would like to be the center of your flower. As you will see some of mine having large focal beads and some have a cluster of smaller beads like freshwater pearls
💗Tea lights Or votives
💗 Templates to trace if you want- I just cut out my circles free form
💗fine clear filament or fishing line that fits through the eye of your needle.
First Step:
This is for the basic around flower That reminds me of a poppy, One of my favorite flowers.
Plan what size of flower you want. Then cut three to five circles of different sizes getting bigger to smaller or smaller to Bigger. Second Step:
Light your Tealight and proceed with caution. First experiment with the scrap of fabric, Preferably as shape similar to the one you're about to melt. Hold the edge close to the flame Going closer Very slowly, Until you see the ad start curl. If you have a flame, Your fabric has ignited Blow it out right away! You do not want to get so close that the fabric start on fire. It took me a lot of tries to get it right. If it helps you, Keep up little spray bottle of water or dish of cold water to put your finger In case it gets burnt.
And if you feel that it isn't safe enough perhaps this isn't the project for you. The last thing I want is someone to get hurt.
All I know is my hands to shake all the time and I was able to do it without any serious incidents. Second Step:
Plan the center of your flower, arranging the beads or just use one large bead or even a button.
And have your fishing line threaded through your needle. All ready to go. Third Step:
Once you have all Your circle Melted around the edges, It is time to assemble your flower.
Stack them according to the sizes that you cut them Big to smaller. Fourth Step:
Select the bead or beads that you wanted to go in the center of the flower. Thread needle with the fishing line. Fifth Step:
Push the needle up through the center or so out of the flower from the backside up And go back down and back up through a few times To secure the layers. Leave about a 2 inch tail, so that you don't pull the line, all the way through And have something to knot later. Sixth Step:
Pick where you want your first been going to center. Push the threaded needle through it and go back down Through the fabric layers. Personally, I do this two or three times for beads that are bigger. If you're only doing One focal bead, Then end with your needle coming out the back. Cut the fishing line and tie that end together with the beginning "tail" to knot it securely. Seventh Step is optional
Want it too be multi-functional? Sew on a strip/loop of fabric to the back after the center was sewn on. Use an open loop with velcro if you want. Or you can sew whatever finding you want to the back. Such as, a hair band, head band or a brooch pin.
Hope you enjoy making them if you're going to do it.
Thanks for stopping by.
💗HeArtfully Creating,
Anita
LIKE HeArtfully Creating Here on FACEBOOK: https://www.facebook.com/HeArtfullyCr...
Nasturtium by me, Anita Berglund. Acrylic On Canvas
Okay, now that I am looking, I can't stop sharing these great inspirational tutorials. Loving flowers as much as I do. These Ginormous ones remind me of the way I once painted pictures of them! Here is some more inspiration!
HeArtfully Creating!
Anita
Subscribe! Like and Share!! (if you want of course :o)
Hi guys! As often happens, I "accidentally" Stumbled upon Some very beautiful paper flower makingVideo tutorials. If They inspired me I thought that they would inspire you too! Some of them Require Tissue paper. Some, Crêpe paper, And some of themUse coloured card stock Paper! What matters most, They are all Really Beautiful. And I think once you see some of the videos, You will See That it is possible for all of us to make them!
California Poppies by me, Anita Berglund
If you know me, Or have been following this blog, You will know That I have painted Flowers In acrylic on canvas-A lot ! As well, I Have A Huge photo library Of The flowers In our garden, when it was in its prime And these days, I haveReally enjoyed Creating flowers using polymer clay. If you're interested in checking all that outJust searchFor flowersOn this blog to see.
Hope you're inspired As we watch spring (where we live In North America) roll in, bringing us new life, New flowers, And new inspiration.
HeArtfully Creating!
Anita
Subscribe! Like and Share!! (if you want of course :o)
If you would like to make other kinds of gifts or even home accessories for your self, you might like this article. In December, the idea was to make gifts for some ladies we know. What do many ladies and girls like? Flowers and candles of course! Time to create floral candle holders. Often ideas are gained from simply using your art making materials. I have discovered that using translucent polymer clay and colouring it with translucent alcohol inks, or just teeny bit of coloured clay, allows you to make pieces where light can shine through. The thinner the clay, the more the light glows through. So that is what I did. Hot Pink!
This hot pink candle holder was formed around a ceramic sphere that I found. As you will see in the next article, I formed and shaped the petals onto the glass or ceramic shape. It is important to make sure you make a test holder if you are uncertain of how the baked clay will be once removed. It is possible to make it too closed and high, around the form that you can not remove it. I have one like that!
Below are some photos of the completed holder.
Hope everyone had a great summer! Did you all enjoy creating? Whether it is drawing, painting, sculpting, writing, weaving, cooking, singing, knitting.....well, the list is endless when it comes to creativity. Bottom line, hope the creative wheels were whirring away. It has been a while since posting any articles because our computer died and I had to learn how to work on a lap top. Actually, I tried an IPad first but couldn't get it to do what I usually do on a computer. Because my hands and arms have weakened muscles, using a laptop has been a challenge. For me, the keyboard is too far ahead so it is a challenge reaching the keys. In fact, as I type this I am using one hand and a pencil eraser to reach. See, there is always a way to accomplish tasks.
HeArtfully Creating
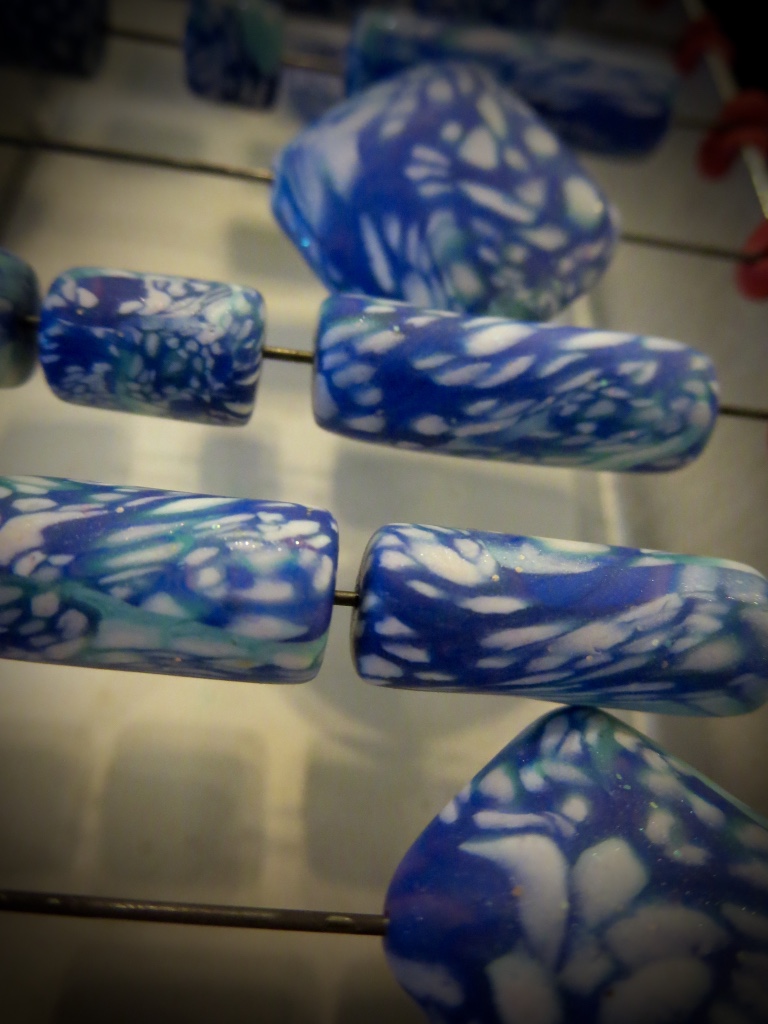
Not only did I spend the summer figuring out our computer situation, but, our street was totally under heavy construction. That meant not being able to come and go freely because our driveway had a deep cavernous, drop off for a bit along with scrambled dirt for a street. My husband and I both use wheelchairs and cavernous holes and scrambled dirt make mobility a challenge. Thankfully, I enjoy creating so much that I rarely leave home anyway! That means I spent my time doing the very thing I love, creating. I wanted to share some random photos of my polymer clay pieces. Some as works in progress as well as finished beads and cabochons.
Slicing The cane to make the flowers you see at the top of the page.
Ready For The Oven
Cabochons and Beads All Baked And Ready To Be Transformed
Recently, I also made a spool for spool knitting out of polymer clay and 18 gauge wire for the prongs! My Dad taught me about spool knitting when I was jus a wee one :o)
Thanks for Stopping By! HeArtfully Creating, Anita :o)
Come back next time or Subscribe to be the first to read about My Biggest Polymer Clay Lesson Learned This Summer
Subscribe! Like and Share!! (if you want of course :o)