A place to encourage the creativity of artistic minds of all ages. Offering Ideas, Inspiration and Instruction and sharing the work of others who inspire me!
I love giving my pieces a name when I put them for sale in my Etsy shop ( www.abergiecreation.etsy.com ) - but this one hasn't been posted yet, so no name so far. Hmmm....what name should I give this?
I Made A Lot Of Resin Pieces That Day!
A way back I got to play around with epoxy resin for the first time. It takes patience and care and about 24 hours to fully cure and shouldn't be used if you are young. There are too many warnings about safety and I wouldn't want to cause any vulnerable persons to dive into a material that could cause some harm if not used correctly. At first I was a little paranoid about using it. It was because most of the tutorials I had watched prior to using it, were adamant about wearing gloves, having ventilation, and not getting it on your skin. However, I did loosen up once I became familiar with it and it did touch my skin. If that happens, wipe off right away. Baby wipes and rubbing alcohol with rags are your best friend when using resin and clay too. I look forward to working with it some more but haven't yet. So far...
It was a really fun first time and out of that resulted some really cool potential pendant pieces (See above), at least that was my intent when designing and making them. Using silicone molds, I poured the resin in along with polymer clay inclusions that I made, such as the orange leaves below. The word inclusion was something I have learned about from watching Christi Friesen's tutorials. Check her out, she's a mighty artistic inspiration.
And I also dropped in glitters and other sparkling elements like acrylic rhinestones. Based on my own experiences, these acrylic sparkly bits from nail
Can you see the glitters and sparkly bits?
art places (mine are usually from Ebay and Amazon), have held up fine in the oven at 275 degrees Fahrenheit. Yet, mostly all the tutorials I have watched, say only use glass and crystals. If you are are not sure, you try on a scrap piece before using acrylic/resin pieces for inclusions.
It took a while to transform my square into something spectacular, but I finally did. If you see the photo where the piece is in it's simplest beginnings, I then embellished the square resin and clay piece into a more interesting, hopefully beautiful pendant with a bale made from wire,(another idea from another jewellery artist, Keepsake Crafts). As well, the polymer clay decorative addition was textured and accented with beads and mica powder.
Thanks to so many great tutorials, I also learned how to make my own end caps, again thanks to Patricia Roberts -Thompson. out of clay (those are the end parts holding the ribbon ends and clasp). Along with accent beads and using sari ribbons to suspend it on.
Hope you are a little bit inspired to create something!
💗HeArtfully Creating,
Anita
Here Is Original Leaf and the Mold I made using silicone and cornstarch and acrylic paint for colour.
Can you find the original piece in there? (front middle)
Here Is the finished pendant turned into a necklace!
Here Is the finished pendant turned into a necklace!
Subscribe! Like and Share!! (if you want of course :o) LIKE HeArtfully Creating Here on FACEBOOK: https://www.facebook.com/HeArtfullyCr... HeArtfully Creating Blog: http://heartfullycreating.blogspot.ca... A Bergie Creation Shop Blog: http://abergiecreation.blogspot.ca A BERGIE CREATION - my handmade jewelry shop www.abergiecreation.etsy.com Facebook: https://www.facebook.com/abergiecreation Twitter: https://twitter.com/abergiecreation YOU Tube Channel https://www.youtube.com/user/anitaand... Pinterest: https://www.pinterest.com/abergiecrea... HeArtfully Creating: http://heartfullycreating.blogspot.ca Sure Hope Gazette: http://surehopegazette.blogspot.ca Walking Way Overrated http://walkingwayoverrated.blogspot.ca TUMBLR http://anitaberglund.tumblr.com
Here Is the finished pendant turned into a necklace!
Hi guys! I just wanted to share A pair of faux knitted square stud earrings that I recently made for fun. After watching some photo knitting Techniques and polymer clay, I tried and tried and couldn't seem to get it to look like knitting.
After some more learning, I figured out what I was doing wrong.
So please learn from my mistake, I'm going to post a couple of video Tutorials So you can learn how to create the faux knitting look in clay.
My mistake? Make sure you twist the two strands of clay in one direction, twisting away from you and then the second set of strands, twist towards you, laying them down side by side, in alternating directions.
That way when you lay them side-by-side they will look like the knitted look you're going for. For the longest time I was stumped and didn't get it, I'm a slow learner. The key is to not give up. Once you get that part, it is a very Simple technique that looks real. We all know that knitted items are soft and squishy. So when you touch these, Of course they are not.
To Make The Pink Square Studs that I Did You Need...
💗 A set of earring studs with backs that have a flat disc to attach clay to
💗 2 complimentary colours of Polymer Clay of your own choosing
💗 Krazy Glue or a strong bonding glue OR, you can push the post base into the clay in it's unbaked state and bake it on
💗 Mica Powder for Sparkle
💗 Straight blade cutter
💗 Needle tool
What Next?
💗 Watch the video tutorials below to learn how to "knit" with clay. The smaller you roll out the strips of clay, the smaller your "knitting" stitches will be. In the videos below, are a few various sizes. MoClay's brooch stitches are about the closest to my stud square size.
Once you create a small sheet of "stitches," cut out matching squares. Mine are about 1cm x 1cm or 10mm x 10mm. I did not use a cookie cutter but if you have one, you can.
Then I laid each square onto a contrasting colour that I rolled out to the same thickness almost. Taking a straight blade, slice along all 4 side of your knitted square. Smooth it all out on the edges with your fingers.
💗Texturing: I took a needle tool and poked a texture into the back and sides of the coloured back.
💗Highlighting: Then I took a a hint of mica powder from the lid of my powder and highlighted wherever I thought best.
💗Bake face up, flat, on a piece of cardstock or paper on a ceramc tile, at the manufacturer's temperature for one hour. Yes, it says a shorter time on the package, but I have learned from other artists the clay is stronger when baked at least one hour even if it is thin. Or you can bake them on a crumpled up tissue if you want.
💗Once Cooled. I just squirted a bit of Krazy Glue on the center back and placedd the posts on. Let sit for a while.
Voila, all done!
FAUX KNITTING TUTORIAL VIDEOS
Be inspired and comment below letting me know if you have try this technique. I would love to know how it went for you.
It is another day closer to summer! Depending where you are, there are early, mid or late spring flowers. Here in Thunder Bay, our spring garden didn't fare well. Out of about sixty tulip bulbs planted, we had about two! Yes, we fertilized when we planted them :0( As well, our crocuses, (or is it croac-eye?) and daffodils are no more and it looks like our large oriental poppy perennial plant is surrendering to the same fate as the spring bulbs! Clearly, I stink at gardening. It doesn't help that our entire street, right next to our garden was all dug up for about 2-3 months last year. But, the odds are my green thumb lost all circulation and shall not flourish. (Hey "Flourish," that makes me think of dear Christi Friesen's book of that title)
On That Note...
Polymer Clay bloom by Anita Berglund
Since I can't make our garden flourish or even grow, I can keep creating faux flowers using polymer clay or other materials like fabric! So I just wanted to share some new pieces I have recently been working on, hoping to inspire you. If you can't grow an actual garden of flowers, you can flood your home with handmade botanicals whenever,
Our one of my many glazing disasters! Thanks late today
I have answers And want to share them with all who will listen!
If you follow this blog at all, Then you may remember my struggles regarding Glazing my polymer clay pieces. Even when I would take the advice of the online Lessons from fellow Artists, My pieces would still end up sticky And unusable. Or sometimes I could sand off all the Icky glaze And use Renaissance wax. But generally, Not too many happy glazing moments In the studio. Even trying to get advice didn't seem to render any solutions. Until today when I was watching one of Patricia Roberts -Thompson's Great polymer clay tutorials. Yay! I Am not Alone!
As I was watching her very informative video about making a cuff bracelet, She shared The best tip about using any type of polyurethane/Minwax/ Polymer clay safe Glazes...In the video of her bracelet tutorial, which I suggest watching All the way through, At the 3:40s mark, She explained Importance of mixing Glazes no matter what kind it is! She even explained why People like me have had so many troubles With stickiness and I assume peeling. Turns out I am not alone, Trisha have the same thing happen. However she learned far quicker than I. Listen to her explain the importance Of stirring. Remember gently of course or you will get bubbles. Don't get me started on bubbles and glazes, argh! Just happy to be able to share this. After all, It's why HeArtfully creating his here, Not just to Inspire creativity, Bike to share the valuable lessons from so many great artists Out In Internet Land. Now Watch!
Please check out Her Video and hear what she has to say about a very important topic. Trust me it is very important, I have ruined more beads than I care to Remember. Don't forget to subscribe to Her channel if you want to learn more valuable Polymer Clay information.
Thank you so much Patricia Roberts -Thompson! You have no idea What a relief your information provided. Thank you for all your hard work and sharing your great videos. It is great that you provide so many tips and tricks to help those who are always learning like myself.
Hope this information was helpful.
💗HeArtfully Creating,
Anita
LIKE HeArtfully Creating Here on FACEBOOK: https://www.facebook.com/HeArtfullyCr...
This article is about I'm boxing and setting up of my new Alice pasta machine, As well as a bit of a review about my Amoco machine. There's a bit more you may be interested in. It is about my first panic attack regarding The Atlas 150 machine. Take a look at this picture and I will tell you more Once we get through the unboxing/review part.
As I mentioned in the previous Post about my Amaco machine that lost It's clamp knob, most polymer clay artists used a conditioning machine Which is essentially a pasta machine, Or as I started out - Using a Amaco clay conditioning machine. Now it is not an essential piece of equipment but it is extremely helpful if you do not have strong hands or you produce a lot of clay sheets. Definitely Worth, investing in an inexpensive clay or pasta machine.
As I mentioned in the video and article Prior to this one, The Amaco Clay conditioning machine works perfectly for me for over two years. Aside from the knob falling off, Which my has been rectified by Using a part of his C clamp, It worked great. Now I do not know what normal life expectancy is for a clay conditioning machine, So maybe over two years is too short, I don't I don't know. What I do know is for someone who started out not knowing for sure if polymer clay addiction would Be something I was able to use, starting out on a half-price Amaco Clay conditioning machine, that never gave any hassles, was a great idea. Half price because my husband used the Michael's craft store coupon.
Last week I decided I better get a replacement machine because the Amaco clay Conditioning machine finally started to wear out. For the first timeIt history, In My studio that is, It started to jam the gears and then began clicking and seizing up almost. Noticing that most clay artists use the atlas Bar Marcato pasta machine for their clay, I asked the question on a polymer clay, Facebook page AndDid some research- Concluding that the absolute best Clay conditioning machine is made by Lucy Clay in Europe. It is not something I would be able to use or could afford, So it appears that the good old standby brand Is the Atlas Pasta machine. Thanks again to those who recommended it.
Hello is the video that I made of my husband on boxing the atlas clay machine. Of course there is great excitement And hoopla. So you have to check it out by Keep watching because I also talk about the Amaco machine In case you're interested. Take a Watch Here:
First Impressions And a Lesson Learned
Now for a bit more detail on what happened when I first started trying my new atlas 150. Initially On setting Zero and nine, which are the thickest settings- all was wonderful. The Handle Sits inside the machine very well, Not dropping out like in the Amaco. It also cranks Smoothly and beautifully, you really can feel the quality in the machine. Assuming all was working fine, I continued on with my day And didn't try any other settings on the machine.
Day Two: Wanting to play with it, I took a different piece of clay than the one we used on day one and started reducing it, as soon as I went to a thinner setting, about three and even four, the clay looked like this! Needless to say, I was mortified! I had heard talk on another tutorial about how the cheaper Sculpey brand machine does stuff like this, but Never the great Atlas machine! Ready to Write a letter to the company and return it from where I purchased it from. As well as, let those who recommended this machine know what it happened and ask if I am doing something wrong, I suddenly got the idea to try a clay that was not as soft or sticky.
Keep in mind the Amaco clay could handle this piece of clay no problem.
We began rolling out a stiffer piece of clay I'm thankful we discovered that the rippling effect did not happen On all clay. That was when I realized duh, oh yes it
is a pasta machine after all, Not meant for Clay. It would make sense that you would need to add flour if it was a pasta dough that was too sticky. But then if this is the case, then why are people using this machine instead of the made for clay machines? Like I said with the Amaco machine, I did not have any problems like this.
I must say that after we testedIt, I and my husband were amazed at how send the clay can get. There is no way I will ever use the mega thin settings on this machine, But I can see why those who can handle their clay well, Would want a machine like this. Just curious about the whole Ripple thing.
Conclusions:
Be careful not to use using very soft or sticky clay. This particular batch had FIMO mixed into it With Premo, Fimo gets very soft And even sticky, not to mention it was a very warm day inside. I am assuming the Atlas has this restriction for clay.
What is your Experience?
Because I know so many people use the atlas machine for conditioning or clay. And because I've never heard anyone complain about rippling playOr having to use a certain Condition of clay, Meaning do not use sticky clay. I really want to know if this is just me, is there something wrong with my machine or is this normal?
If you are new to using polymer clay, You may not know that the one piece of machinery most of us use is either a pasta machine or a polymer clay conditioning machine. Essentially, the latter looks just like a pasta machine. My husband bought me one when I first started claying a couple of years ago, from the Michael's craft store. Normally I don't recommend going there because it is so expensive- Unless you have a coupon for 40% or 50% off of course. Needless to say, he did.
First of all, I do recommend the Amaco machine. Mine worked well.
The machine is by Amaco. Actually contrary to some of the reviews I've seen, it worked very well, for just over two years. It wasn't until recently that the knob that I'm going to talk about in the video below, fell right off. The knob I'm talking about is the one that tightens the clamp - Like a C clamp that holds the machine to the table while you crank it. It was plastic of course. Kind of ironic, since polymer clay Is polyvinyl Chloride which is a type of plastic as far as I understand it anyway. Necessity Breeds Ideas...
Wrestling with what to do next, I got the idea to make a new knob for The clamp. After all Polymer clay once cured or baked, when thick enough, is quite strong. Want to see what happened? Did It Work? You will have to watch below:0)
Subscribe! Like and Share!! (if you want of course :o)
A few years ago, I discovered how to make flowers out of satin, taffeta and organza fabrics. It became a bit of an addiction because I got to melt the edges of the flower pieces with a tealight candle. Needless to say, I went through about fifty to one hundred candles! It is risky, easy to burn the fingers. But you can make such beautiful flowers, it is worth it all. It is a great idea for bridal fashion accessories as well as for special events like the prom or graduation. You get to pick the color And if you want it shiny use satin, if you want it not so shiny, use taffeta. To add dimension you can use organza. Or you can make it all out of organza For a very delicate Look.
The flowers I made that you will see in the video, were created to be versatile. That was made possible by sewing a piece of fabric, making a loop on the back. Then you can add a brooch pin, Bobby pin, neck Choker, A Barrette blank...attaching it wherever you like. Except it doesn't work for hair elastics or head band elastics because they are closed loops. So as you will see in the video, for some of them I either sewed the elastic to the back of the flower directly or I made a loop using fabric and Velcro, making it even more versatile because you can open and close it around something. Watch The Video Here:
These flowers can be made however you like. You can just cut circles or circles that have petal shapes around them, You can make the petals rounded or pointy. You will need to experiment with it when you melt the edges of the fabric because I tried smaller petal cuts and a lot of them just melted away into nothing. I found that a circle and rounded edges works best for the flowers.
Caution to Youth: Because this involves a flame, please do not try doing this alone, if at all. We can make flowers without a candle flame. Much safer. Flower Making Tips:
Size: Remember if you want a flower that is about 2 inches across, to cut your circles or shapes a little bit bigger because the edges will curl up when they melt as they curve up. Therefore making your flowers smaller than the original cut shape.
To make a fuller flower make more layers of circles In varying sizes. Then when you assemble the flower you have more rows of petals, making your flower fuller. Materials Needed:
💗synthetic fabrics like satin (I used some old pj's), organza and tafetta.
💗Scissors
💗A marker if you want to trace out circles or flower petal shape circles
💗A sewing/beading needle that fit through the beads you use to make the center of the flower
💗Assorted beads or a focal button. Think of what you would like to be the center of your flower. As you will see some of mine having large focal beads and some have a cluster of smaller beads like freshwater pearls
💗Tea lights Or votives
💗 Templates to trace if you want- I just cut out my circles free form
💗fine clear filament or fishing line that fits through the eye of your needle.
First Step:
This is for the basic around flower That reminds me of a poppy, One of my favorite flowers.
Plan what size of flower you want. Then cut three to five circles of different sizes getting bigger to smaller or smaller to Bigger. Second Step:
Light your Tealight and proceed with caution. First experiment with the scrap of fabric, Preferably as shape similar to the one you're about to melt. Hold the edge close to the flame Going closer Very slowly, Until you see the ad start curl. If you have a flame, Your fabric has ignited Blow it out right away! You do not want to get so close that the fabric start on fire. It took me a lot of tries to get it right. If it helps you, Keep up little spray bottle of water or dish of cold water to put your finger In case it gets burnt.
And if you feel that it isn't safe enough perhaps this isn't the project for you. The last thing I want is someone to get hurt.
All I know is my hands to shake all the time and I was able to do it without any serious incidents. Second Step:
Plan the center of your flower, arranging the beads or just use one large bead or even a button.
And have your fishing line threaded through your needle. All ready to go. Third Step:
Once you have all Your circle Melted around the edges, It is time to assemble your flower.
Stack them according to the sizes that you cut them Big to smaller. Fourth Step:
Select the bead or beads that you wanted to go in the center of the flower. Thread needle with the fishing line. Fifth Step:
Push the needle up through the center or so out of the flower from the backside up And go back down and back up through a few times To secure the layers. Leave about a 2 inch tail, so that you don't pull the line, all the way through And have something to knot later. Sixth Step:
Pick where you want your first been going to center. Push the threaded needle through it and go back down Through the fabric layers. Personally, I do this two or three times for beads that are bigger. If you're only doing One focal bead, Then end with your needle coming out the back. Cut the fishing line and tie that end together with the beginning "tail" to knot it securely. Seventh Step is optional
Want it too be multi-functional? Sew on a strip/loop of fabric to the back after the center was sewn on. Use an open loop with velcro if you want. Or you can sew whatever finding you want to the back. Such as, a hair band, head band or a brooch pin.
Hope you enjoy making them if you're going to do it.
Thanks for stopping by.
💗HeArtfully Creating,
Anita
LIKE HeArtfully Creating Here on FACEBOOK: https://www.facebook.com/HeArtfullyCr...
Want to add colour to your metal jewellery findings? Well, take a look at my short video, to give you a suggestion on how you can easily perk up and transform your metal pieces! It is super easy!
Be inspired:
Watch Now!
Lots of Colourful Fun!
Subscribe! Like and Share!! (if you want of course :o)
Here is a video below that I made to hopefully inspire some polymer clay jewellery pendants. Here are a variety of methods and techniques. Hope you are even wee bit surprised!
Watch Below!
HeArtfully Creating,
Anita
Subscribe! Like and Share!! (if you want of course :o)
Howdy fellow artists! As many of you may already know, Visual artists love colour. It makes sense that God, our Creator, Thee most Perfect Artist ever, created not just our eyes to see - but the bazillion of colors all around us. It is why some of us have an art supplies. Count me in as one of those people.
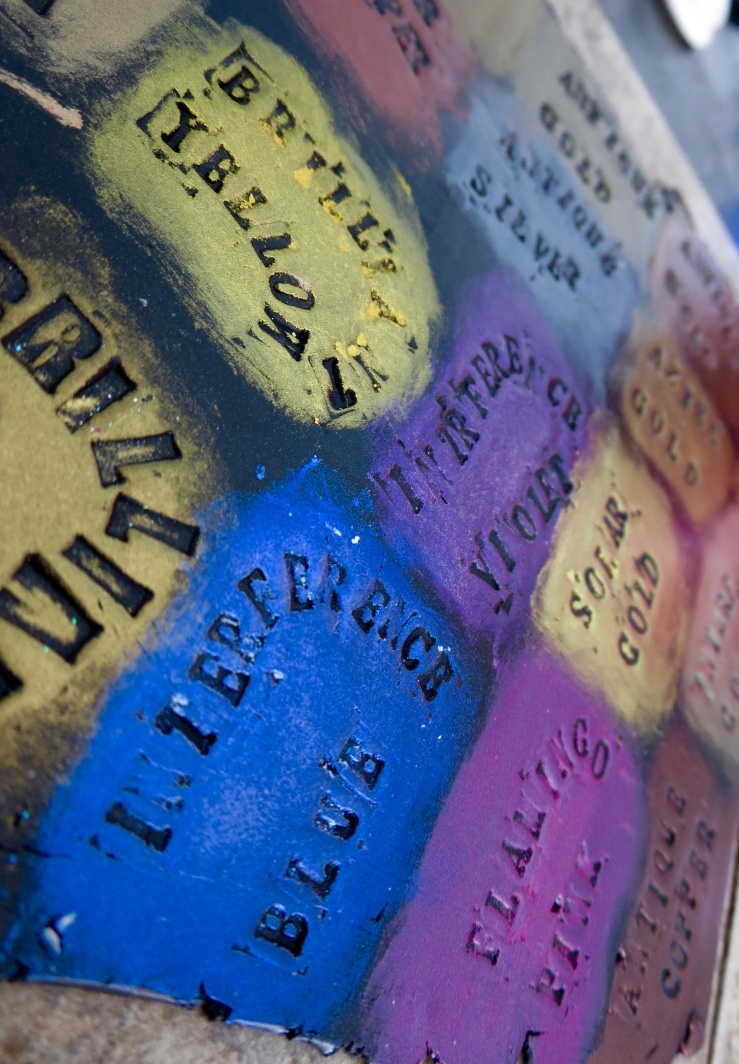
Since I began working in polymer clay, aside from chalk pastels, paints and polymer clay... I love them all and have gotten into the collecting of mica powders. They may be best known by a couple of brand names Pearl Ex and Perfect Pearls. Mica is actually a natural mineral that somehow has been processed in a manner that has been turned into a fine powdered pigment with great shimmer and special effects. It can be used on raw polymer clay or mixed into glazes, clays, liquid clay, gel mediums for acrylics and the like - even water and a spray bottle. Not Just Eyeshadow!
It is probably most familiar as eyeshadow. So if you can't afford the jars, do what I first did and buy a thirty or more plus eye shadow palette on Ebay for under ten dollars! You can use the myriad of colours to add dimension to your polymer clay pieces! Swatch Out!
Below is a video with more details about making swatches of your powders as well as some important notes about Primary Elements Pigment/Mica Powders by Luminary. Take a look.
Be inspired!
Hello guys! Hope you have been HeArtfully Creating whatever inspires you. Lately, I was inspired by Sandy Huntress of Keepsake Crafts (Click here to see the video), to make cool, large hole tube beads. I watched that video over and over. So this video is about how I made some of my tube beads.
As well, I was inspired by Patricia Roberts-Thompson's YouTube Tutorial about making your own bales from polymer clay. She used Sari ribbon. Sari ribbon is wonderful to use in layers, running through tube beads or just as a cord. Check out the video here that inspired me to purchase Sari Ribbon from the shop she mentioned.
Watch my newest Tutorial Below.
Hopefully you will be even a wee bit inspired to try them.
HeArtfully Creating,
Anita
Subscribe! Like and Share!! (if you want of course :o)