 |
| Acrylic Painting On Stretched canvas by Anita Berglund |
Treating The Surface Of Polymer Clay
One of the many lessons I have learned from the many great online polymer clay artists was that the best product to use if you want to glaze your baked clay is, water based polyurethane. So I bought a huge can and spent two days straight glazing my recent pieces.
Because I have also learned that it is far better to create my polymer clay pieces as smooth as possible. Unless you want texture. If the surface is smooth, it can be left or barely sanded, waxed and buffed or glazed and look great. However, it turned out that because my pieces were too smooth, the polyurethane on many pieces peeled. I like to test all pieces after my multiple failed attempts at using other glazes such as triple thick. Some end up sticky and gross. In fact, that has been number one pet peeve. Polyurethane, perfect, no sticky icky surface. It was when I tried to see how durable the shiny surface was with my finger nail, that I discovered the glaze cold peel like good sunburn does. Okay, I use to like peeling sunburnt asking (my own of course!). Needless to say, I was very disappointed.
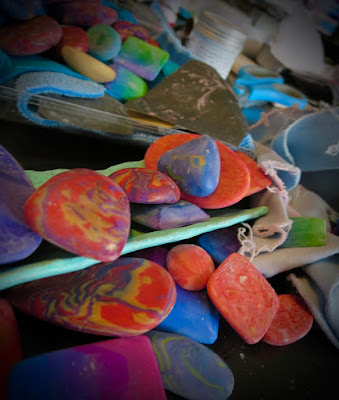
Here are some pictures to document what happened....
This wasn't all that I glazed, but you get the idea... Wanting to know what I did wrong, I researched some more and discovered that polyurethane can peel because of natural oils the is on our hands, so you can use rubbing alcohol to wipe the surface clean of oils. As well lightly landing with a high grit sandpaper first helps it adhere. For me, it just became too frustrating because I didn't research as much as I should have.
To Glaze Or Not To Glaze, That Is The Question!
As you may already know, you do not actually have to put a finish on polymer clay. The clay is far more durable than any finish. A coating of your choice (I a sticking with polyurethane used properly) is helpful if you have glitter or some such thing that you feel may rub off. Mica powder like Pearl Ex actually is fine if rubbed on in one layer onto unbaked clay. If you want to cover it before with a thin layer of liquid clay or after baking with a glaze, that is an option we have.
 |
| Surface Before The Polyurethane |
 |
| See The peeling? Bummer! |
 |
| See The peeling? Bummer! |
 |
| Working On Sanding and Then Waxing And Buffing or Polishing |
 | |
|
 | |
|
 | |
|
Because Polymer clay is so fine and can enter through air passages, it is best to sand using wet/dry sandpaper in a pan of water or because I physically can't do that, I have a tub of water next to my work space. Then I dip my sandpaper and piece in the water, lay them down on a towel and begin sanding. If the surface has roughness then starting with a number 600 should work to get the hard parts off. I have to keep dipping in the water because the polymer powder builds and clogs my paper fast.
If your pieces are as smooth as mine started out, 800 to 1000 works and I even have a 2000 grit paper to finish off with if I want.
Without waxing, I personally wouldn't be able to polish my pieces hard enough. I know of other artists who don't wax. They sand and then use a cotton denim or jean fabric to buff out the clay and it gets super shiny. My hands are not strong enough to do that, so I put a thin layer of Renaissance wax and let it dry for ten minutes and then polish with a soft cloth. I love the finish. So if I can achieve a nice buttery finish with my weak hands, anyone can! Imagine what you can do with healthy muscled hands!!
Hope You Learn Something Inspirational Today!
See You Soon!
HeArtfully Creating,
Anita
 |
| My flowers are okay with a thin layer of polyurethane. I love this piece. |
Cindy Leitz- Polymer Clay Tutor:
Renaissance Wax
Minx Polyurethane - Oil Based
Should I Seal Polymer Clay?
Subscribe! Like and Share!! (if you want of course :o)
LIKE HeArtfully Creating Here on FACEBOOK: https://www.facebook.com/HeArtfullyCreating/
HeArtfully Creating Blog:
A Bergie Creation Shop Blog: http://abergiecreation.blogspot.ca
A BERGIE CREATION - my handmade jewelry shop
Facebook:
Twitter:
YOU Tube Channel
Pinterest:
HeArtfully Creating:


No comments:
Post a Comment