As with any artistic discipline, I like to learn all I can and develop what I can in an attempt to be as original and as unique as possible. As a visual artist I must say, when it comes to the huge variety of polymer clay tools, such as texture sheets, texture rollers, and image transfer methods, cookie cutters, moulds for all shapes....etc.
As tempted as I was to purchase some to help make beautiful pieces. I just couldn't do it. Why? Because as a visual artist, I really struggle with feeling bad or guilty, not working with my own images and shapes. And even if you aren't a professional artist, you can still make your own designs. All you need is the desire to do so. It is far more rewarding, for me anyway, to know that a piece of jewelry or whatever it may be, was all my own work. Maybe I have guilt issues, using existing tools like texture sheets, but it is where I am at at this moment in time.
That being said, at the beginning of my poly clay journey, I didn't know that it was possible to be completely original by making your own textures plates or sheets, as well as moulds. That was until I started searching and discovered folks like Katie from Katers Acres, and some other poly clay artists, who offer tutorials online on how to make a texture plate or sheet out of polymer clay. Yes, there are countless texture making materials out there. But, it is so much more rewarding, if you so choose, to design your own textures and designs and then be able to use those textural designs in your clay creations.


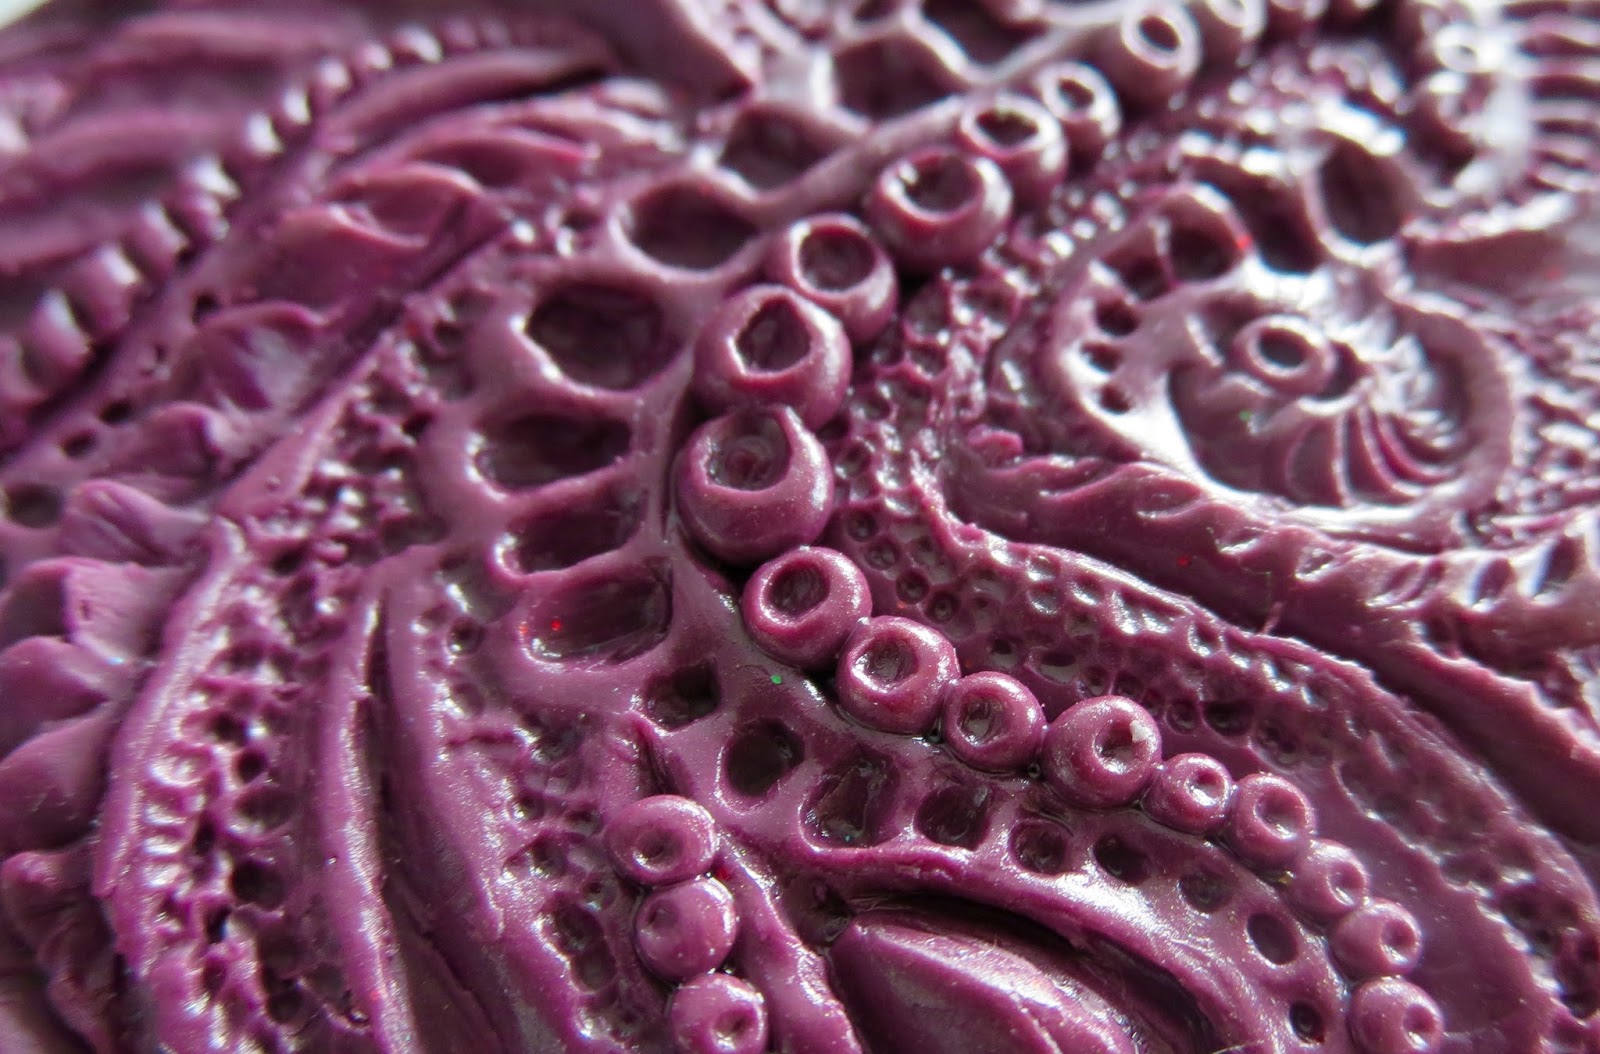
This video is a highlight just to share some of the texture sheets and rollers that I have made from beginning to end. Think of it as doodling on a sheet of clay. In my case, some of the texture plates were carved or pushed into, and some were in the technique of "addition." meaning, you roll out clay lines, dots, shapes and such and add them to a flattened piece of clay. Then bake it and voila, you have your very own texture/design making plate.
After watching a review on Cindy Leitz's Polymer Clay Tutor channel on YouTube, I learned about texture/design rollers you could purchase. Here is that video...
She is another artist I have and keep learning from. I suggest checking her videos out. However, the designs, would not be my own, so I experimented successfully with making my own texture rollers. They work wonderfully! Not saying all these tools
that you can purchase are not good, they are great for anyone who doesn't want to or can't make their own designs.
Suggestions When Using A Polymer Clay Texture Sheet.
Silicone never sticks to anything. That is fine if I was using silicone, but so far, I am not. It means that since my texture impression stamps are made of baked polymer clay, that means there is a fish that the textures can stick to the clay you are trying to imprint on.
What to do? I actually discovered that Baby Oil is one of my favourite tools. I rub baby oil all over the surface of my baked clay texture roller or sheet in a thin layer, especially putting it into the deeper crevices. The professionals may shake there head at me, but I just know that because the clay is so porous, it works well at releasing the raw clay.
Or you can use a spray bottle of water. Just lightly spray the clay with water or the plate/roller and then water releases your texture maker. Water and clay do not mix, so make sure it is dry after. Blot it gently with a lint free cloth or bounty paper towel.
This video doesn't show the making" it process, just the final results. But I will share some links below so you can see how Katie from Kater's Acres first showed me in her video.
Hope this helps a little.
Questions, thoughts or Comments, please feel free to write them down below.
As tempted as I was to purchase some to help make beautiful pieces. I just couldn't do it. Why? Because as a visual artist, I really struggle with feeling bad or guilty, not working with my own images and shapes. And even if you aren't a professional artist, you can still make your own designs. All you need is the desire to do so. It is far more rewarding, for me anyway, to know that a piece of jewelry or whatever it may be, was all my own work. Maybe I have guilt issues, using existing tools like texture sheets, but it is where I am at at this moment in time.
 |
| Here is my first texture plate and the impression I made on the right in a pendant. |
 | |
|


 |
| Here is the result of raw then baked clay, after pressing the texture sheet (on left) into raw clay. |


This video is a highlight just to share some of the texture sheets and rollers that I have made from beginning to end. Think of it as doodling on a sheet of clay. In my case, some of the texture plates were carved or pushed into, and some were in the technique of "addition." meaning, you roll out clay lines, dots, shapes and such and add them to a flattened piece of clay. Then bake it and voila, you have your very own texture/design making plate.
After watching a review on Cindy Leitz's Polymer Clay Tutor channel on YouTube, I learned about texture/design rollers you could purchase. Here is that video...
She is another artist I have and keep learning from. I suggest checking her videos out. However, the designs, would not be my own, so I experimented successfully with making my own texture rollers. They work wonderfully! Not saying all these tools
Suggestions When Using A Polymer Clay Texture Sheet.
Silicone never sticks to anything. That is fine if I was using silicone, but so far, I am not. It means that since my texture impression stamps are made of baked polymer clay, that means there is a fish that the textures can stick to the clay you are trying to imprint on.
What to do? I actually discovered that Baby Oil is one of my favourite tools. I rub baby oil all over the surface of my baked clay texture roller or sheet in a thin layer, especially putting it into the deeper crevices. The professionals may shake there head at me, but I just know that because the clay is so porous, it works well at releasing the raw clay.
Or you can use a spray bottle of water. Just lightly spray the clay with water or the plate/roller and then water releases your texture maker. Water and clay do not mix, so make sure it is dry after. Blot it gently with a lint free cloth or bounty paper towel.
This video doesn't show the making" it process, just the final results. But I will share some links below so you can see how Katie from Kater's Acres first showed me in her video.
Hope this helps a little.
Questions, thoughts or Comments, please feel free to write them down below.
Subscribe! Like and Share!! (if you want of course :o)
LIKE HeArtfully Creating Here on FACEBOOK: https://www.facebook.com/HeArtfullyCreating/
HeArtfully Creating Blog:
A Bergie Creation Shop Blog: http://abergiecreation.blogspot.ca
A BERGIE CREATION - my handmade jewelry shop
Facebook:
Twitter:
YOU Tube Channel
Pinterest:
HeArtfully Creating:
No comments:
Post a Comment